Creating a single task
Creating a single task in Capella Console is a guided, user-friendly process for requesting SAR imagery over a specific point of interest. This article walks you through each step—from setting a target and choosing collection parameters to submitting the task and reviewing cost—so you can confidently initiate new data acquisitions.
With Capella's tasking service, it is very easy to create a new tasking request for standard products. Capella's tasking service accepts tasking requests for point targets and areas defined by a bounding box or polygon area of interest (AOI). To task based on an area defined by a bounding box or polygon area of interest (AOI), follow the steps outlined for creating an area task. To task based on a point target, follow these steps:
1. Set the point of interest
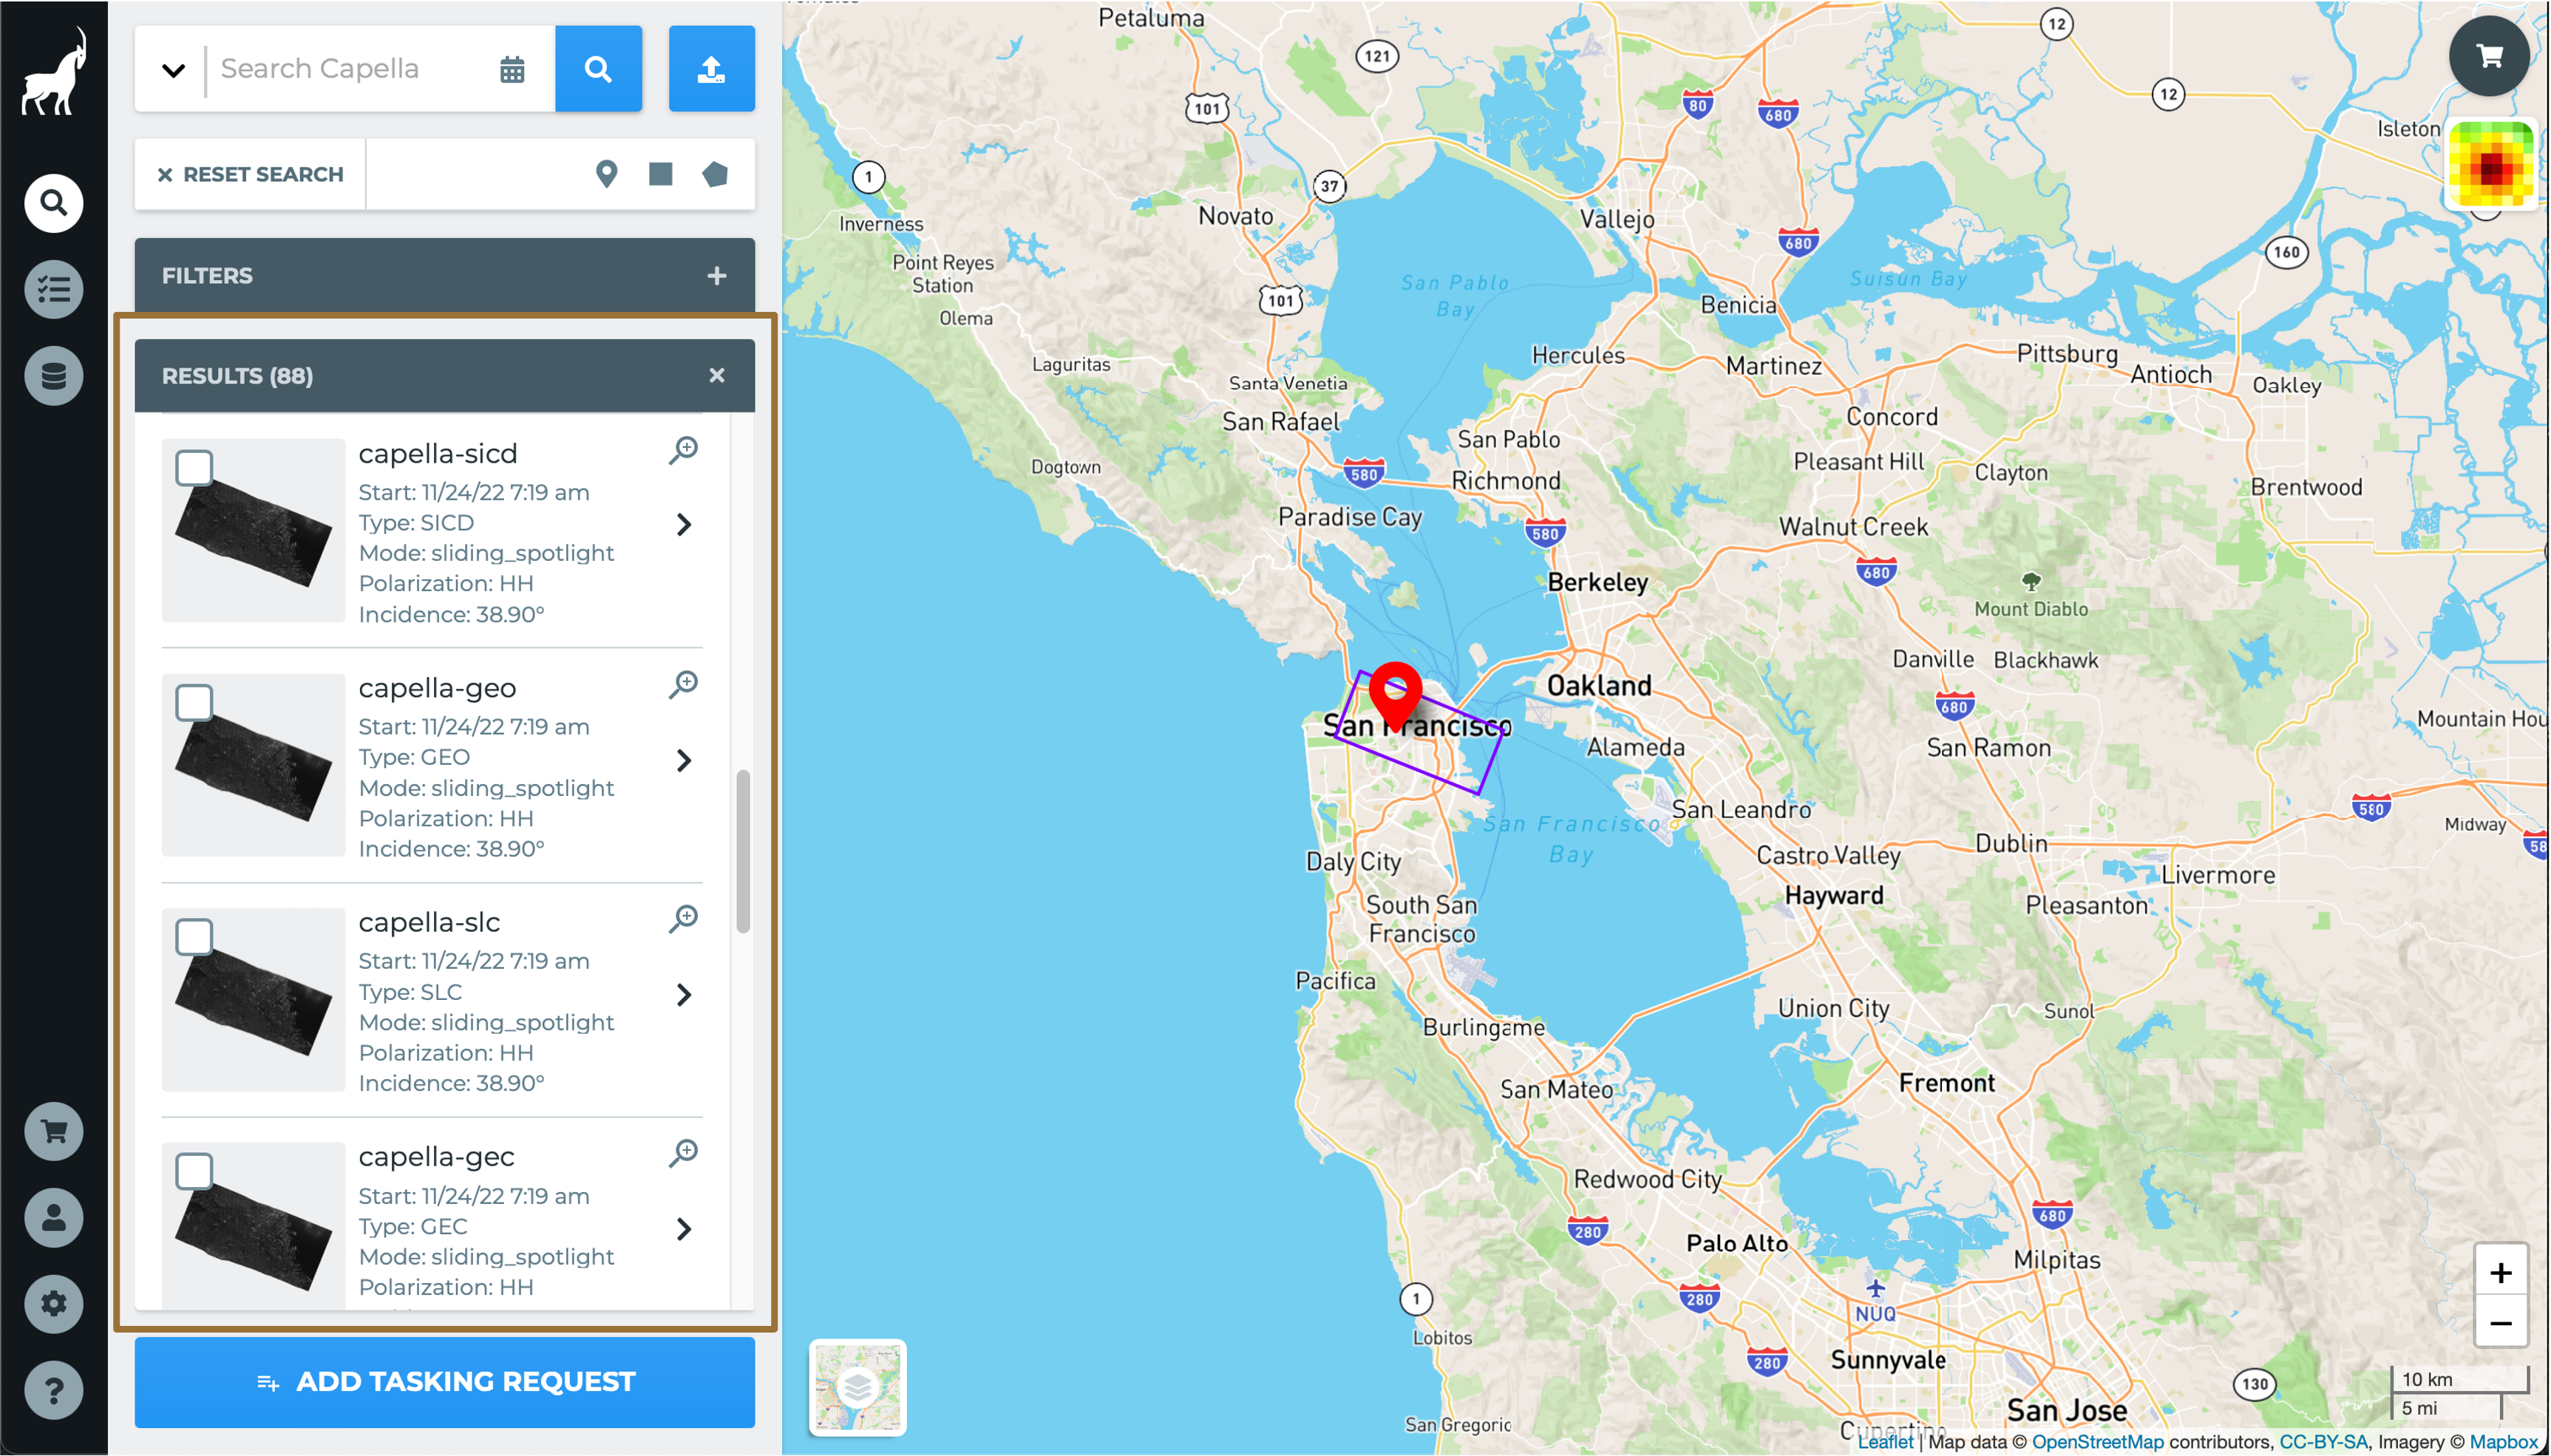
To start a new tasking request, drop a point on the map in the Capella Console. If Capella already has imagery in the archive for this AOI, it will show up in the results list on the left.
2. Click the Add Tasking Request button
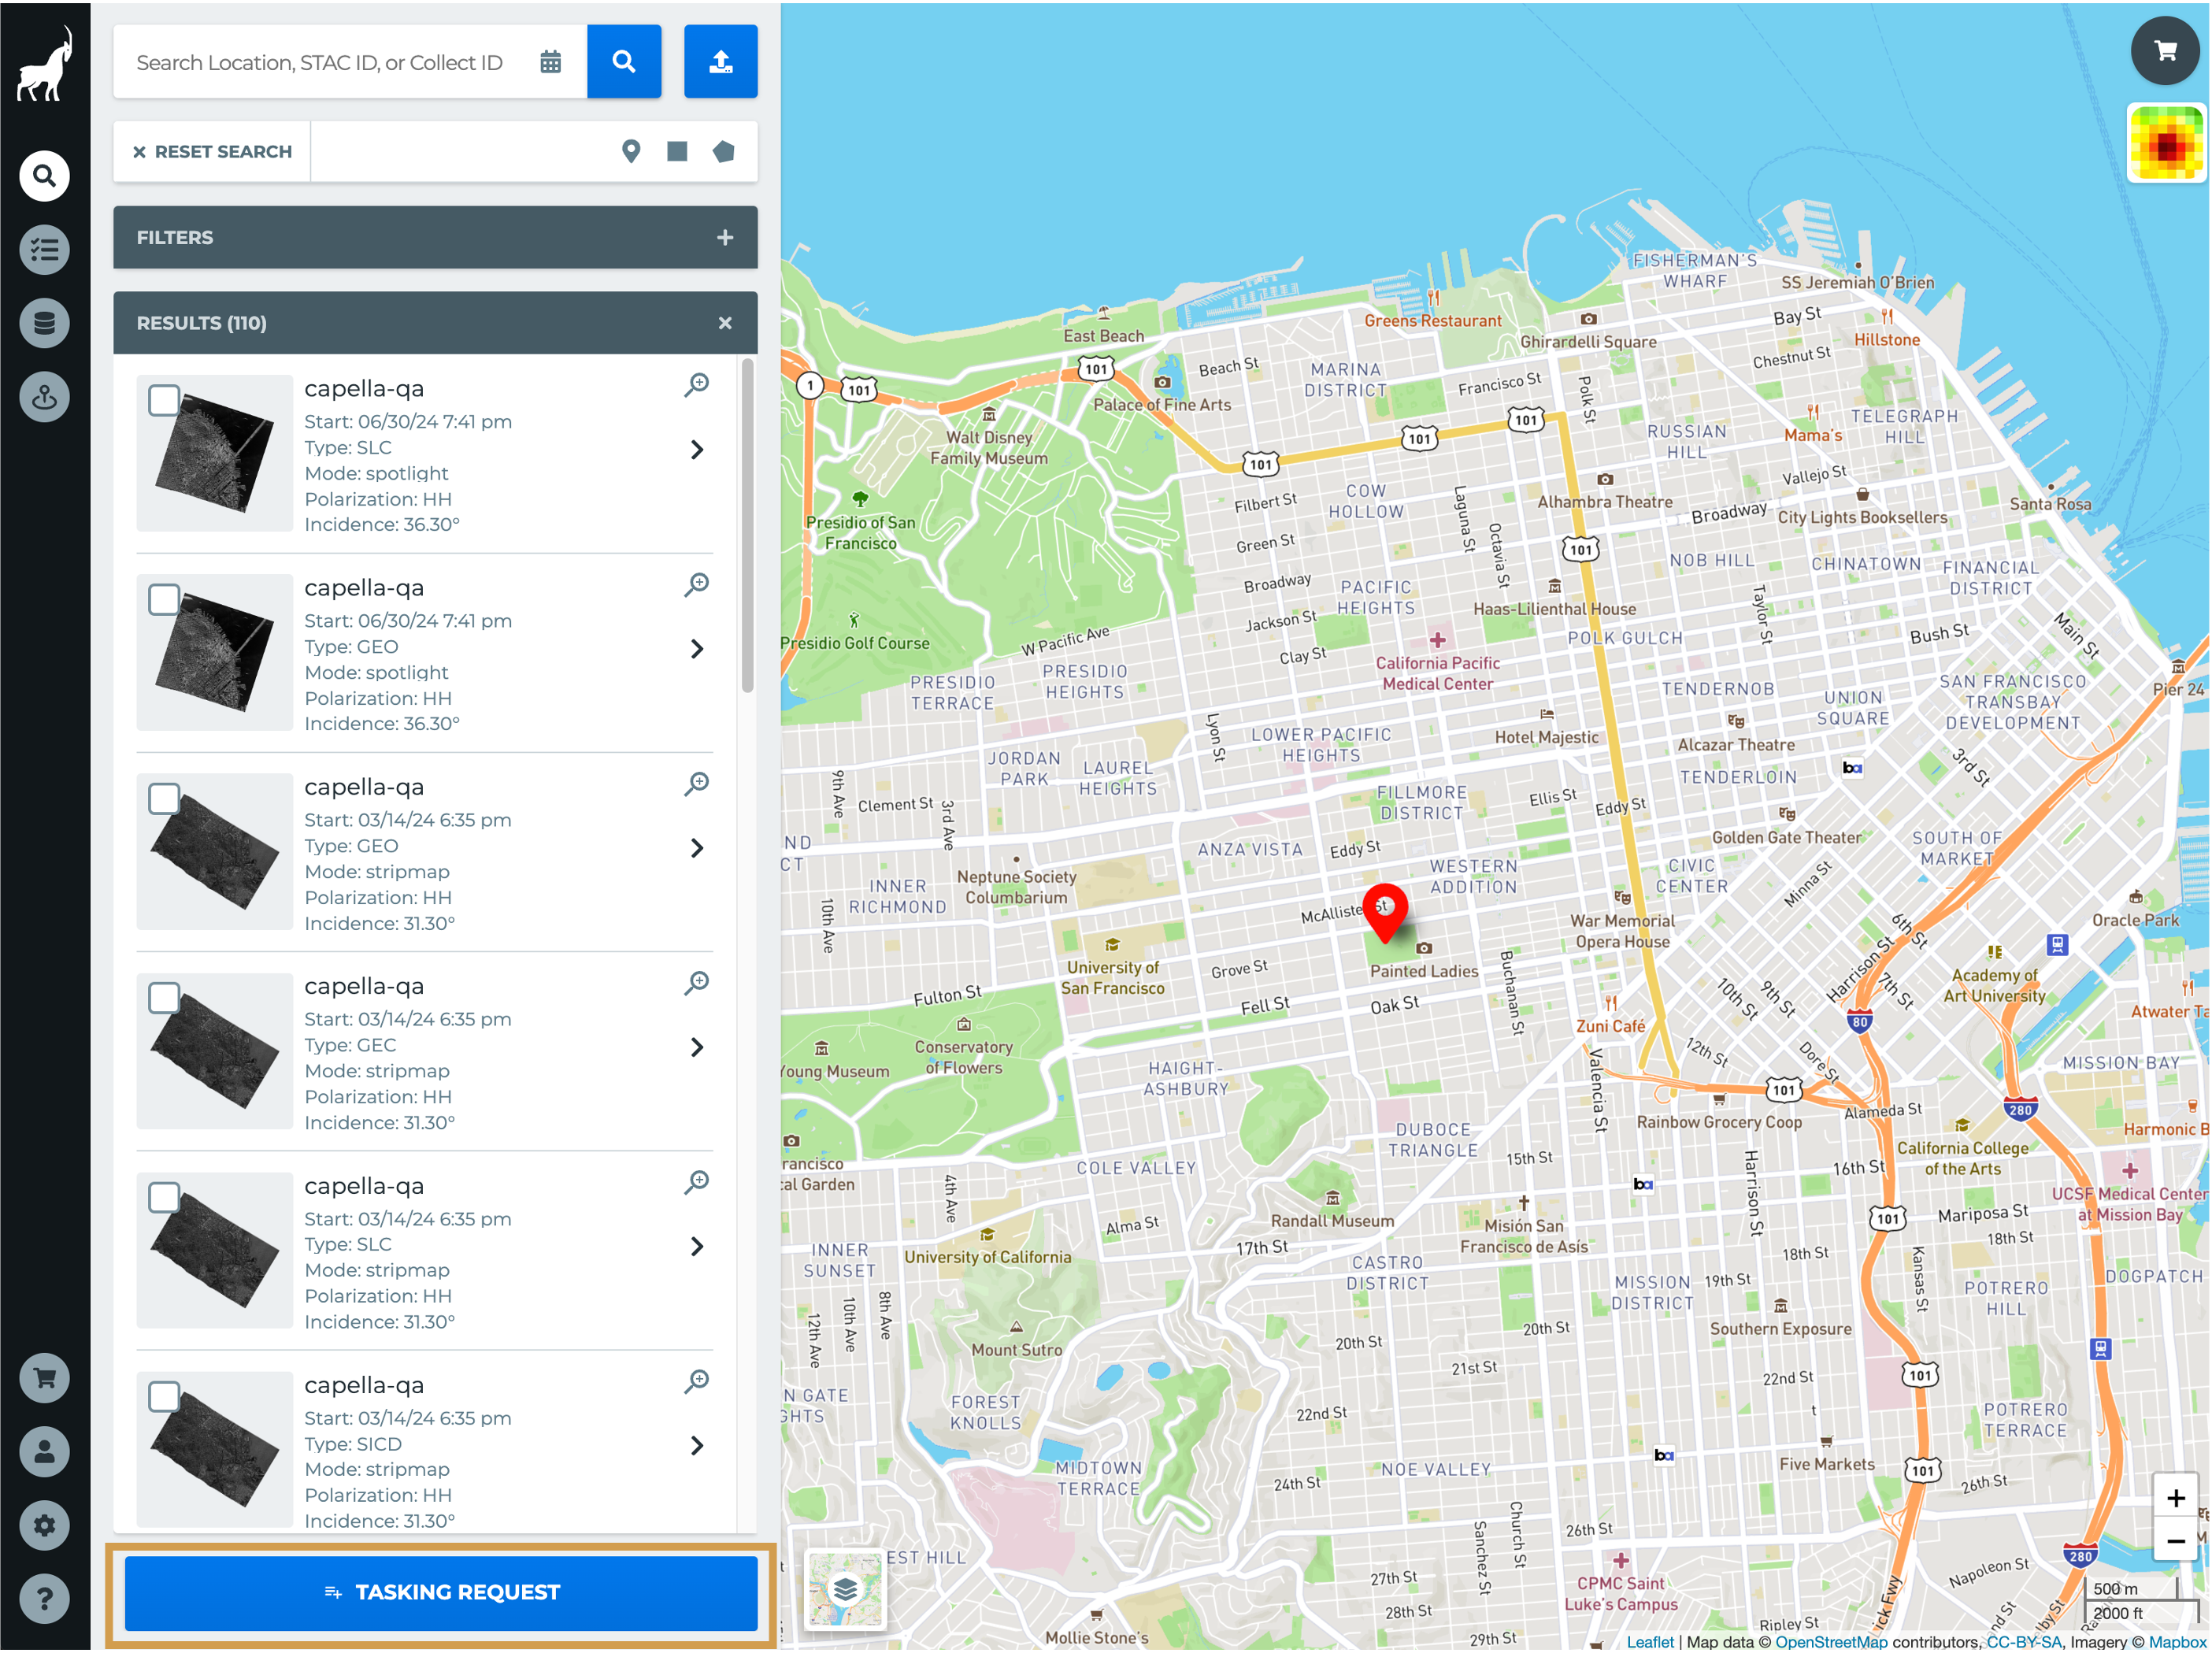
Clicking the Add Tasking Request button will take you to the Task Submission page. Here, you can decide to create a single (one time) tasking request or set up a monitoring campaign over the point using Repeat tasking. For more information on creating a Repeat tasking campaign, follow steps outlined for Creating a repeat task.
3. Set a Target Name for your task request
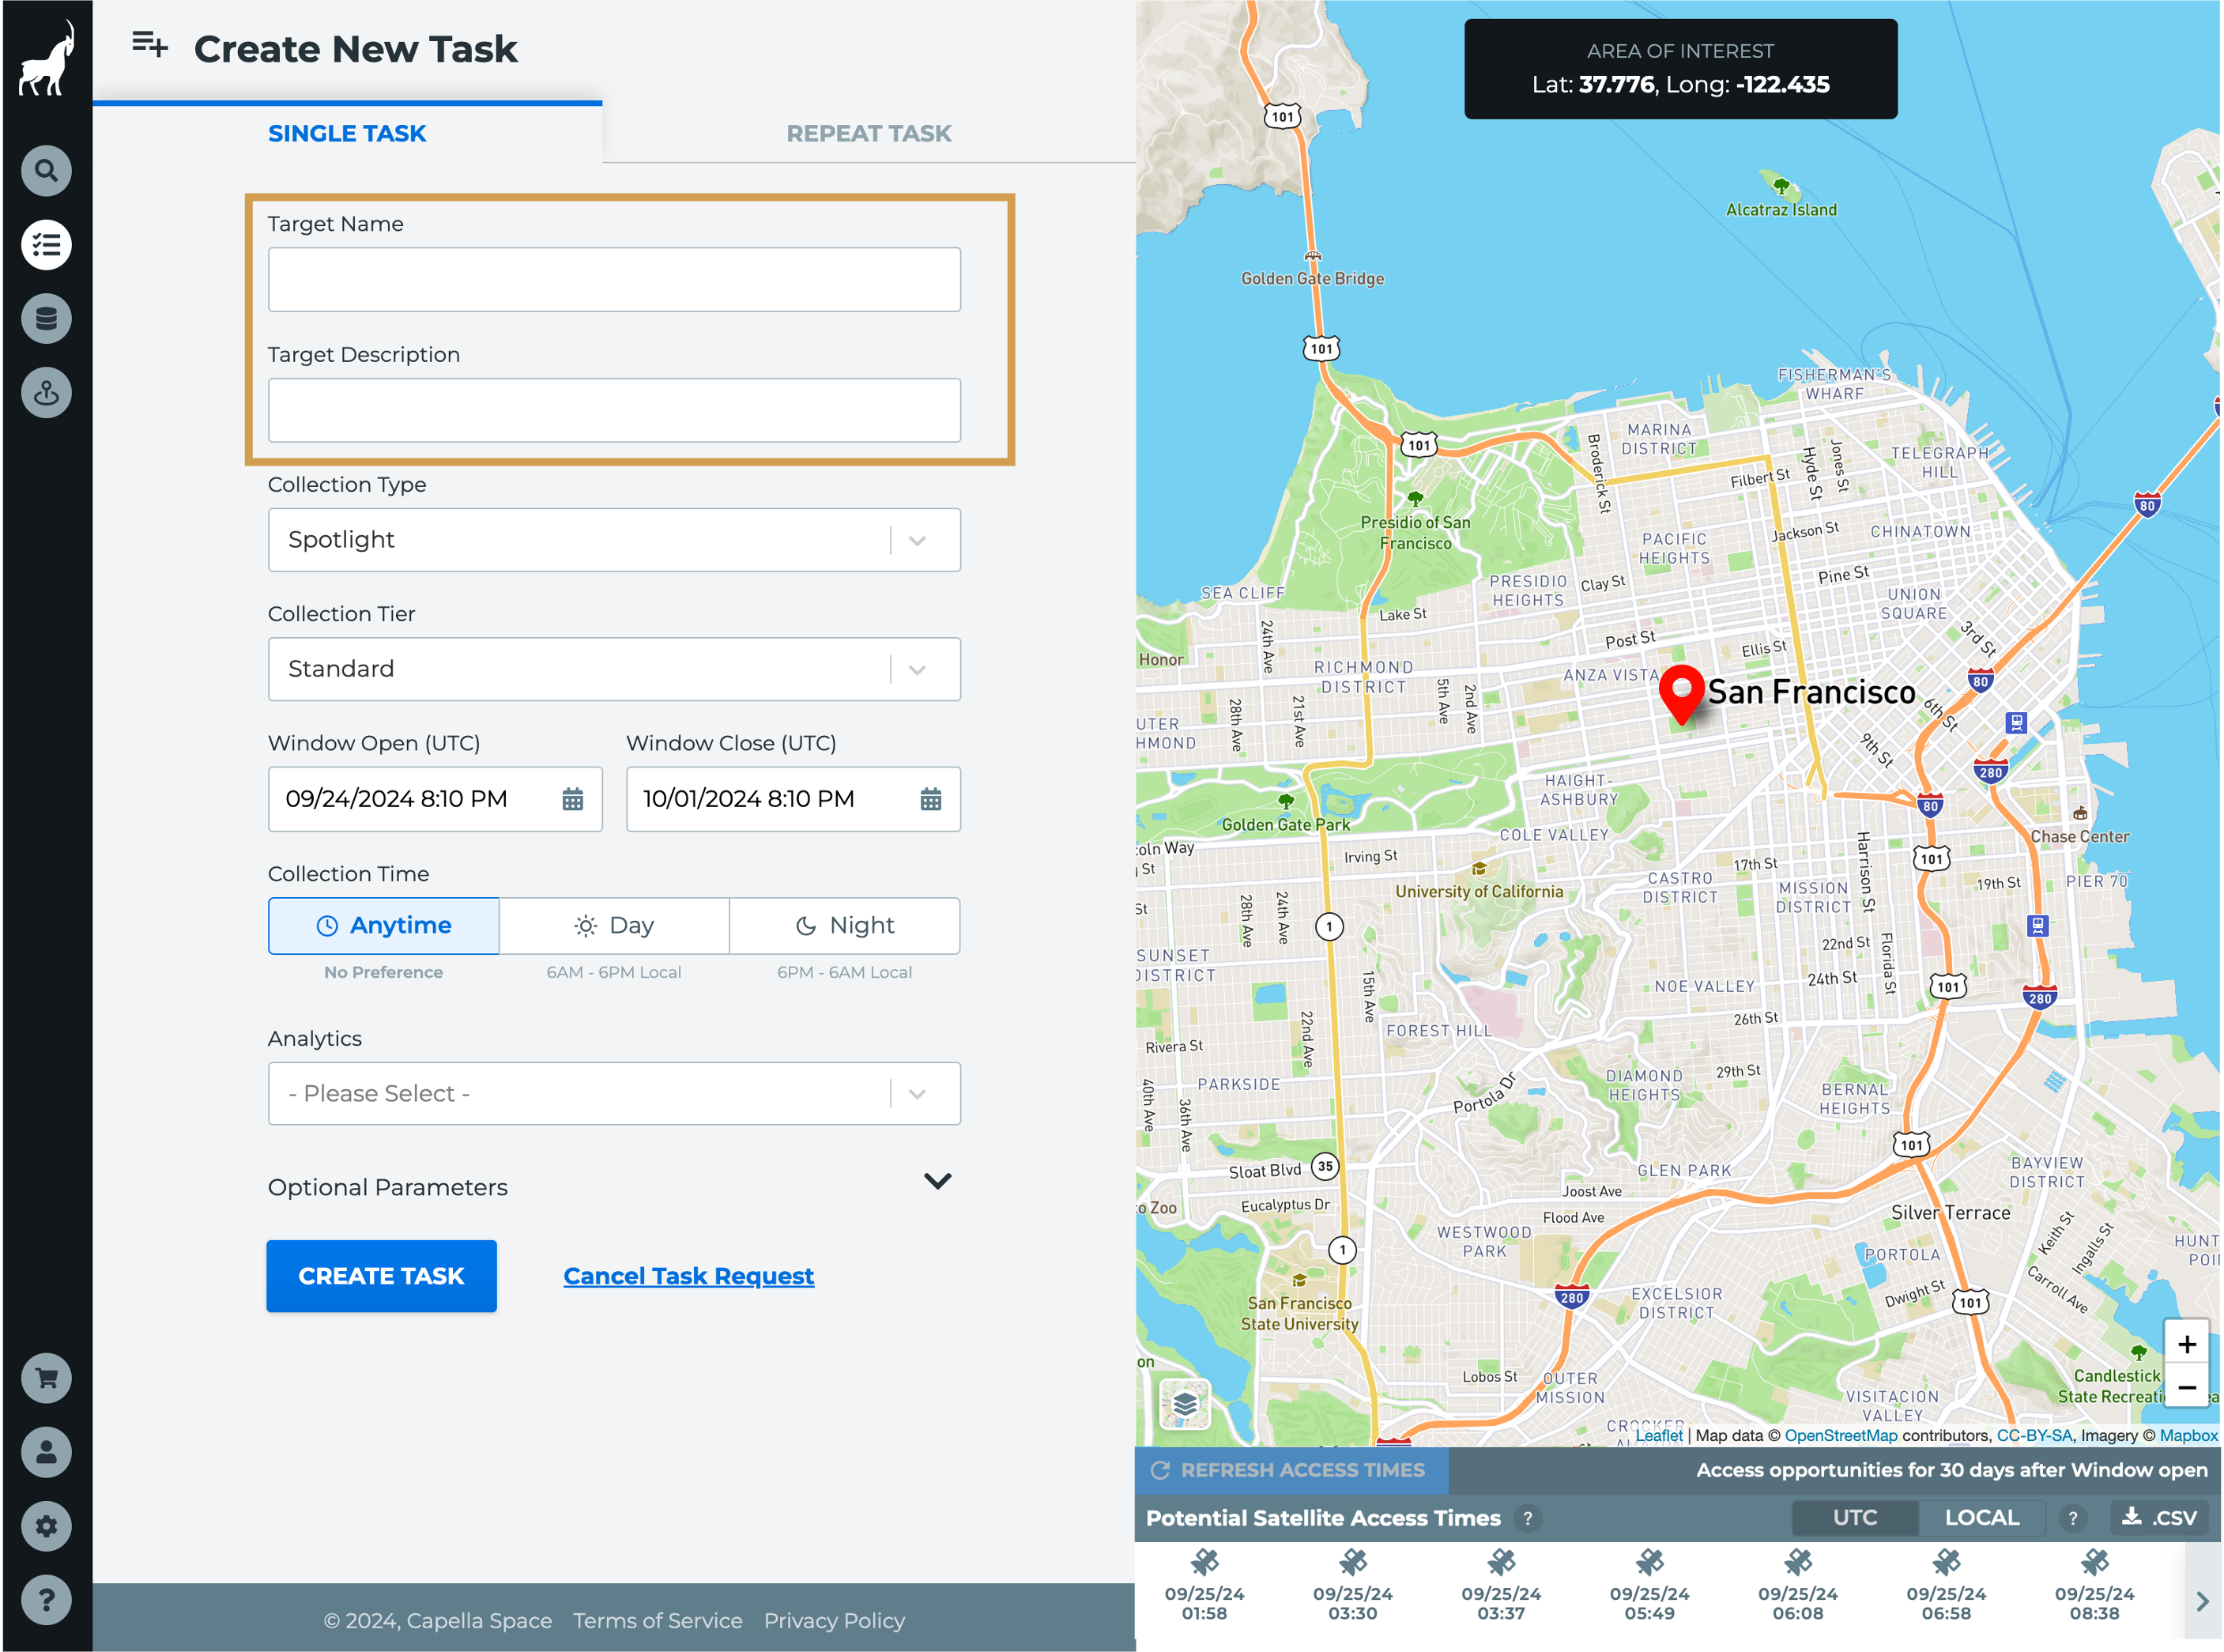
Setting a Target Name enables you to quickly find the tasking request on the Task List page. The Target Description field is an optional field and enables you to provide user-specific details to the tasking request.
4. Chose a Collection Type
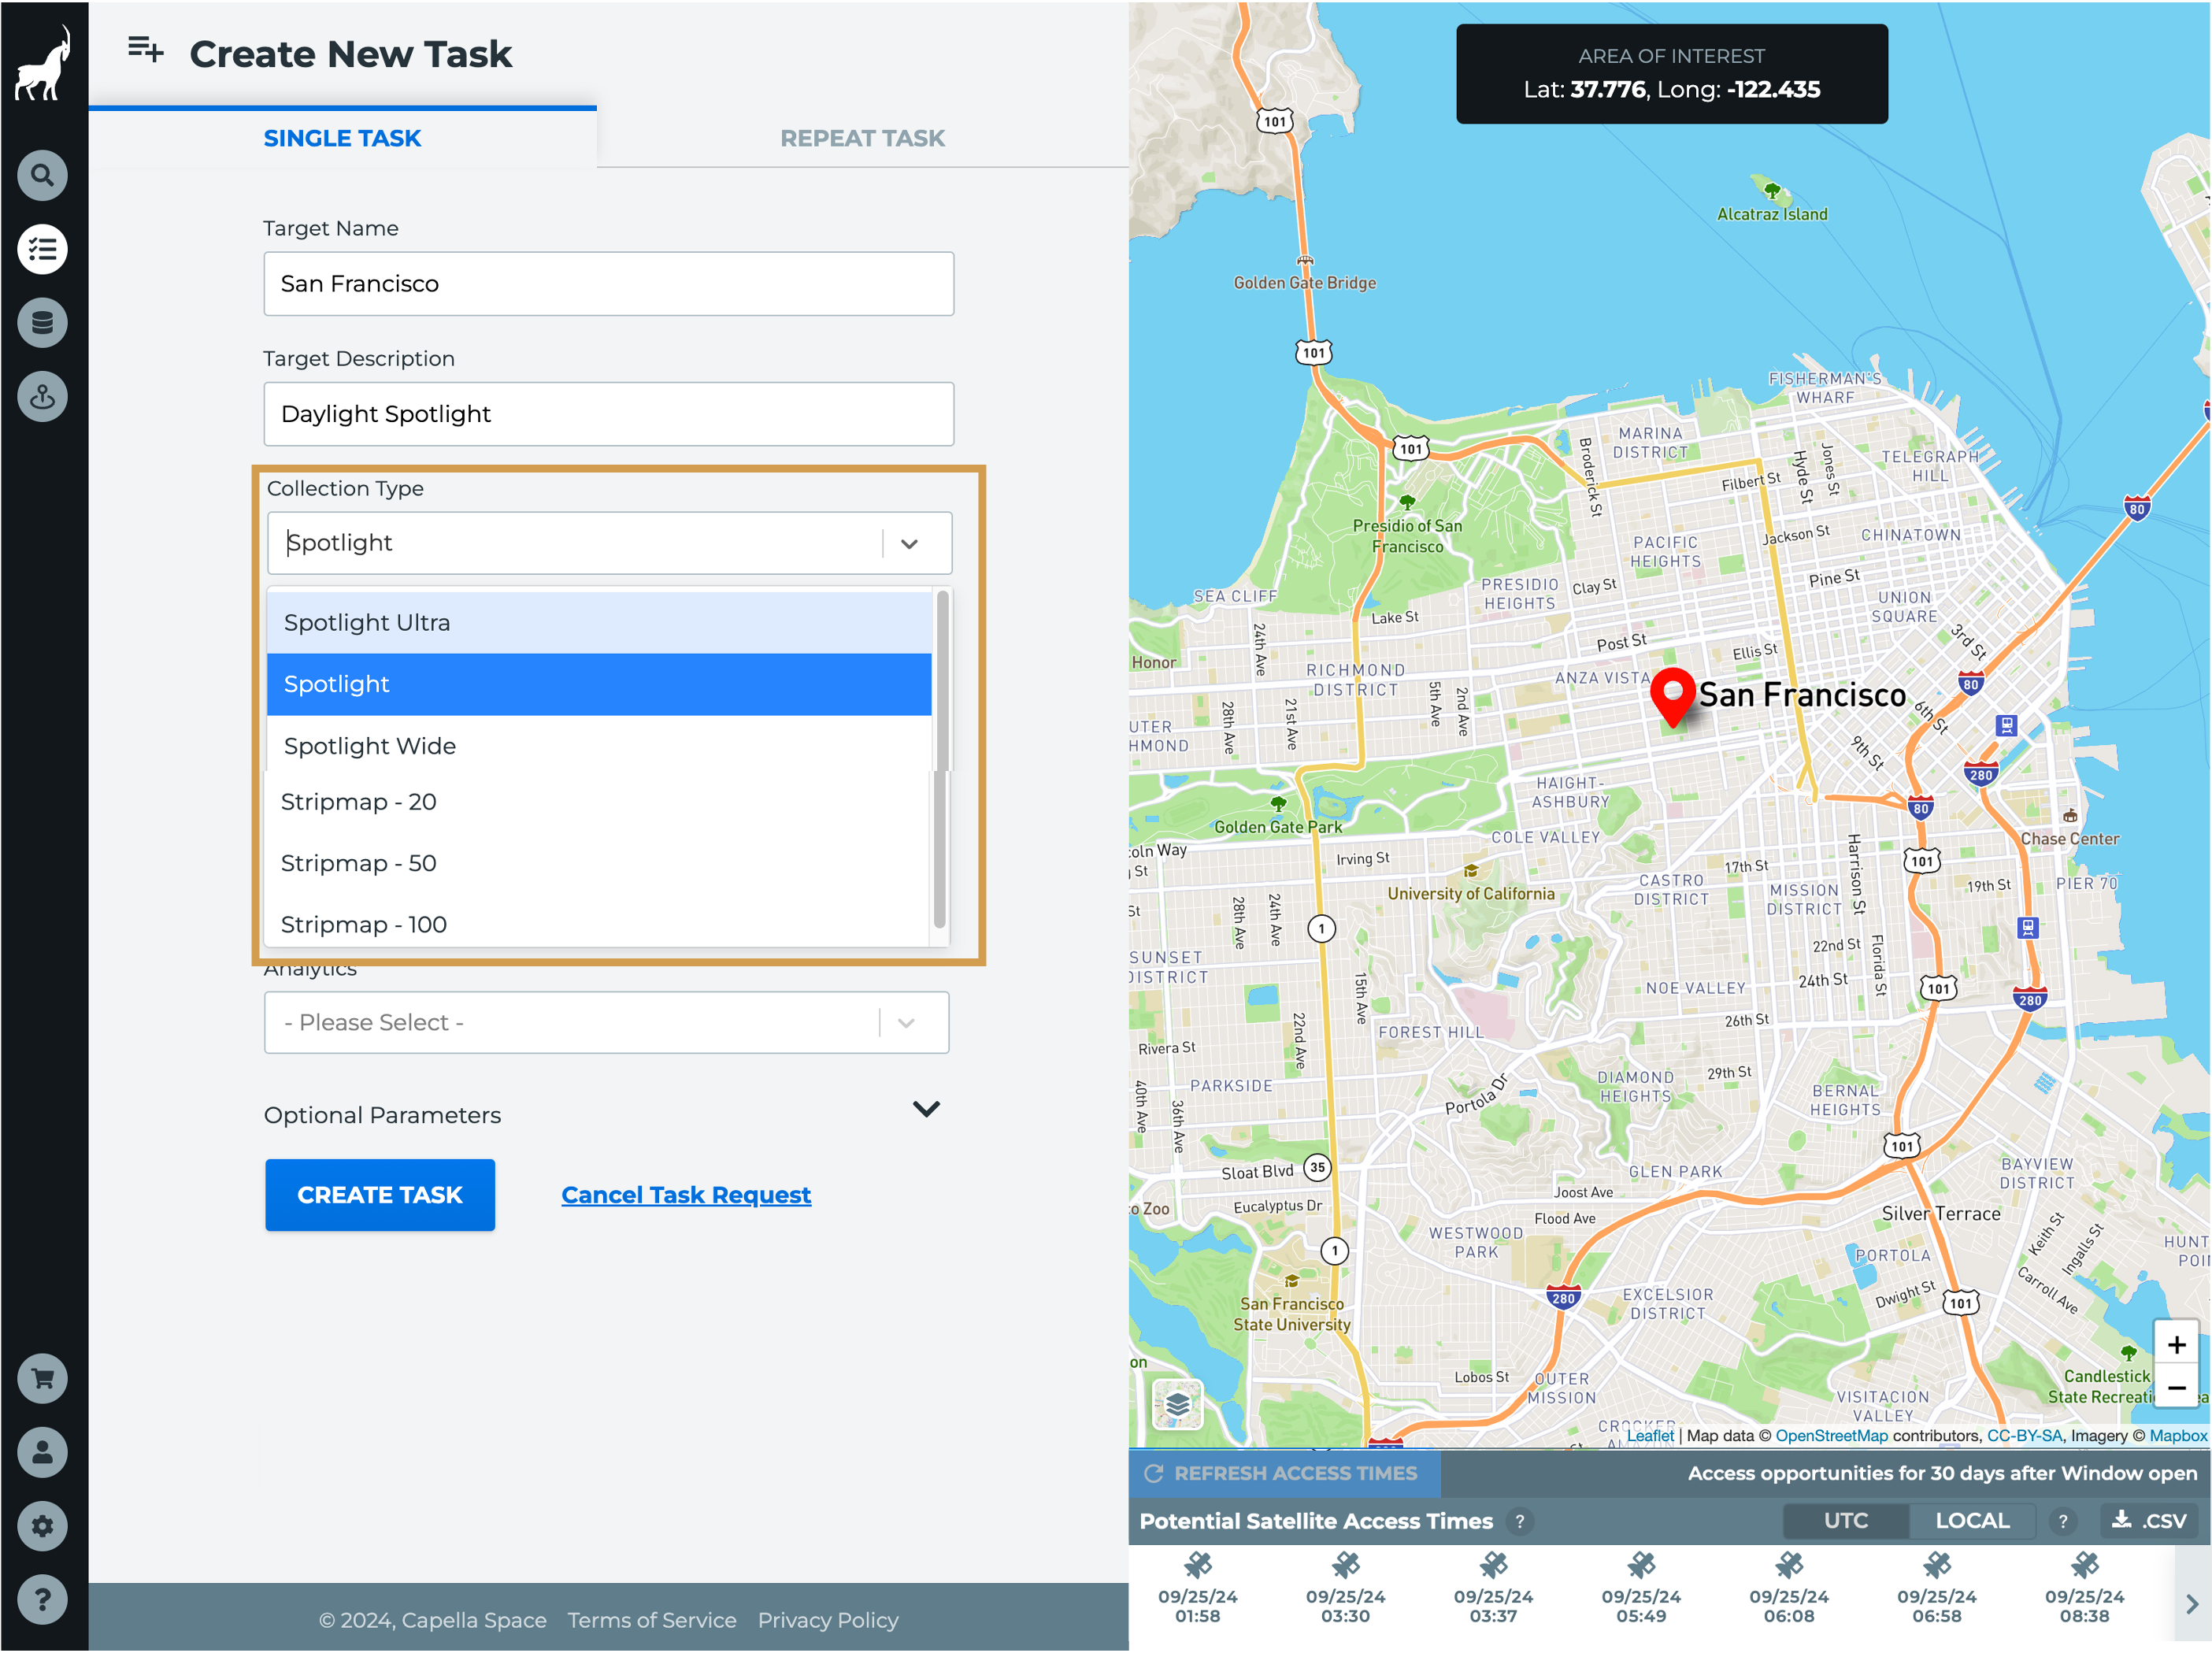 For single point tasking requests, the Capella Console defaults to the Spotlight collection type.
5. Chose a Collection Tier
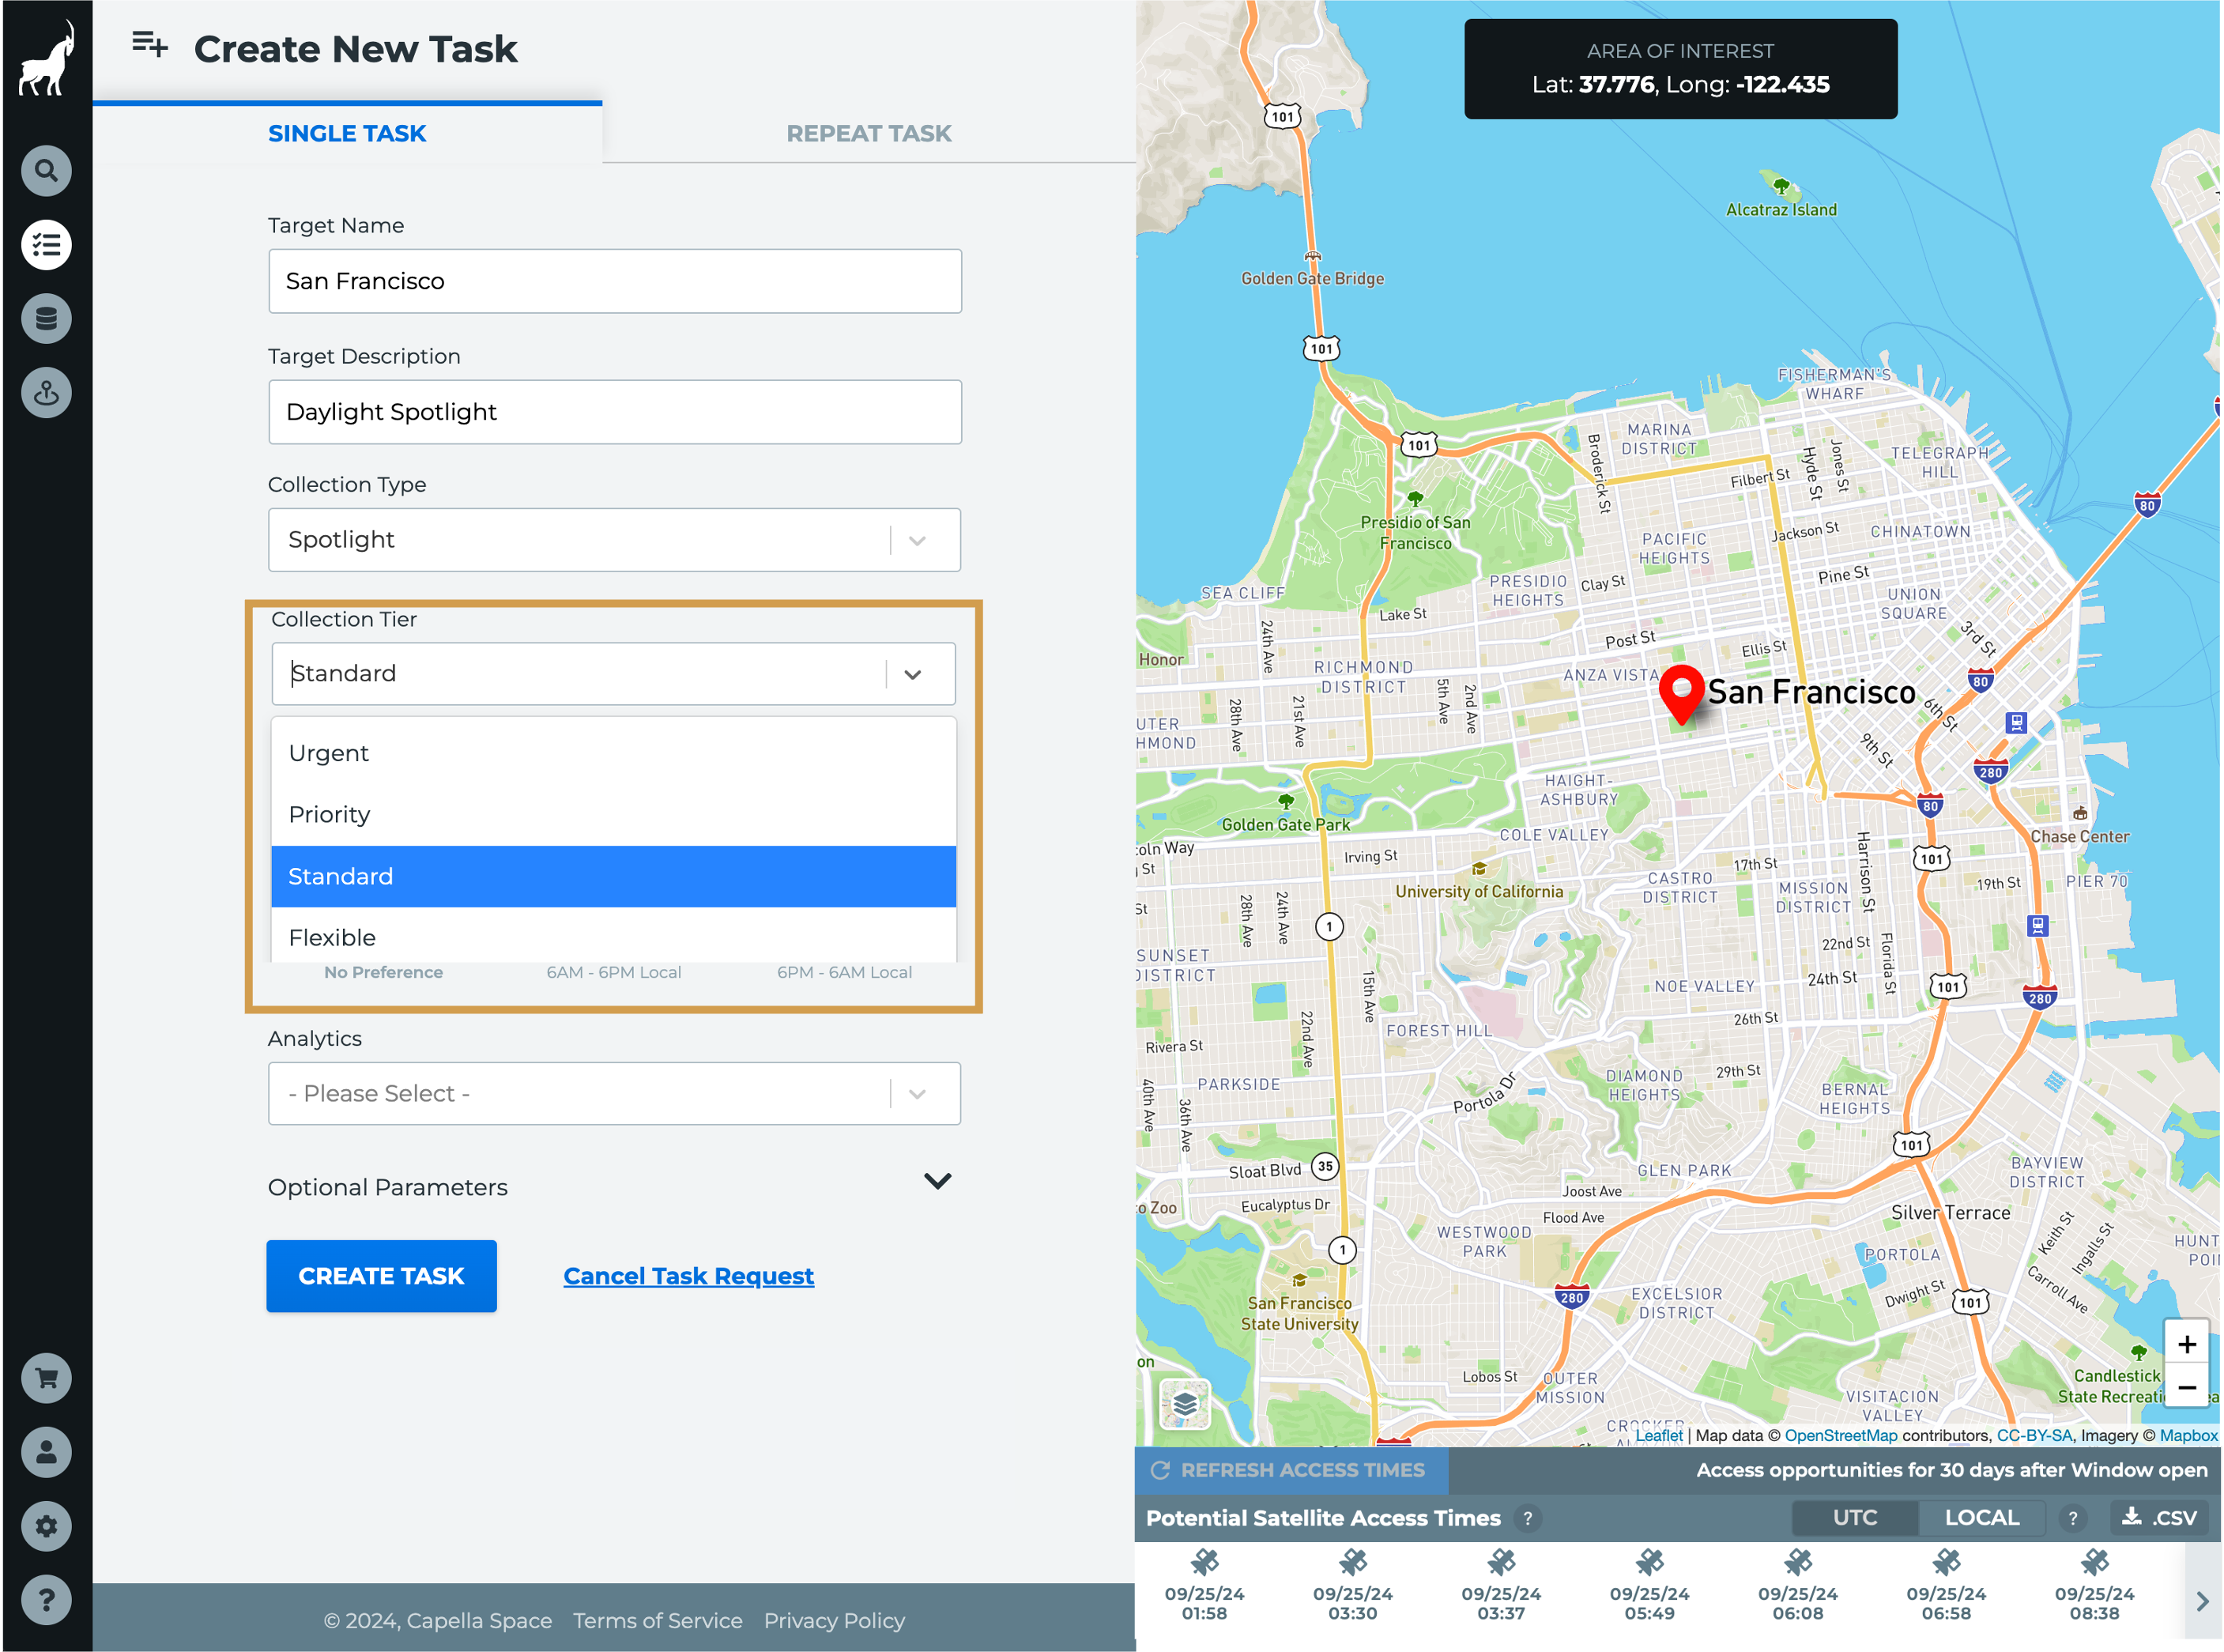
The tasking system supports unique tasking tiers for point tasking to give you additional control of the collect timeframe and tasking request priority. The Tasking Tier sets the important of your task and determines the period of time within which Capella should collect your requested imagery.
6. Set Window Open and Window Close date & time
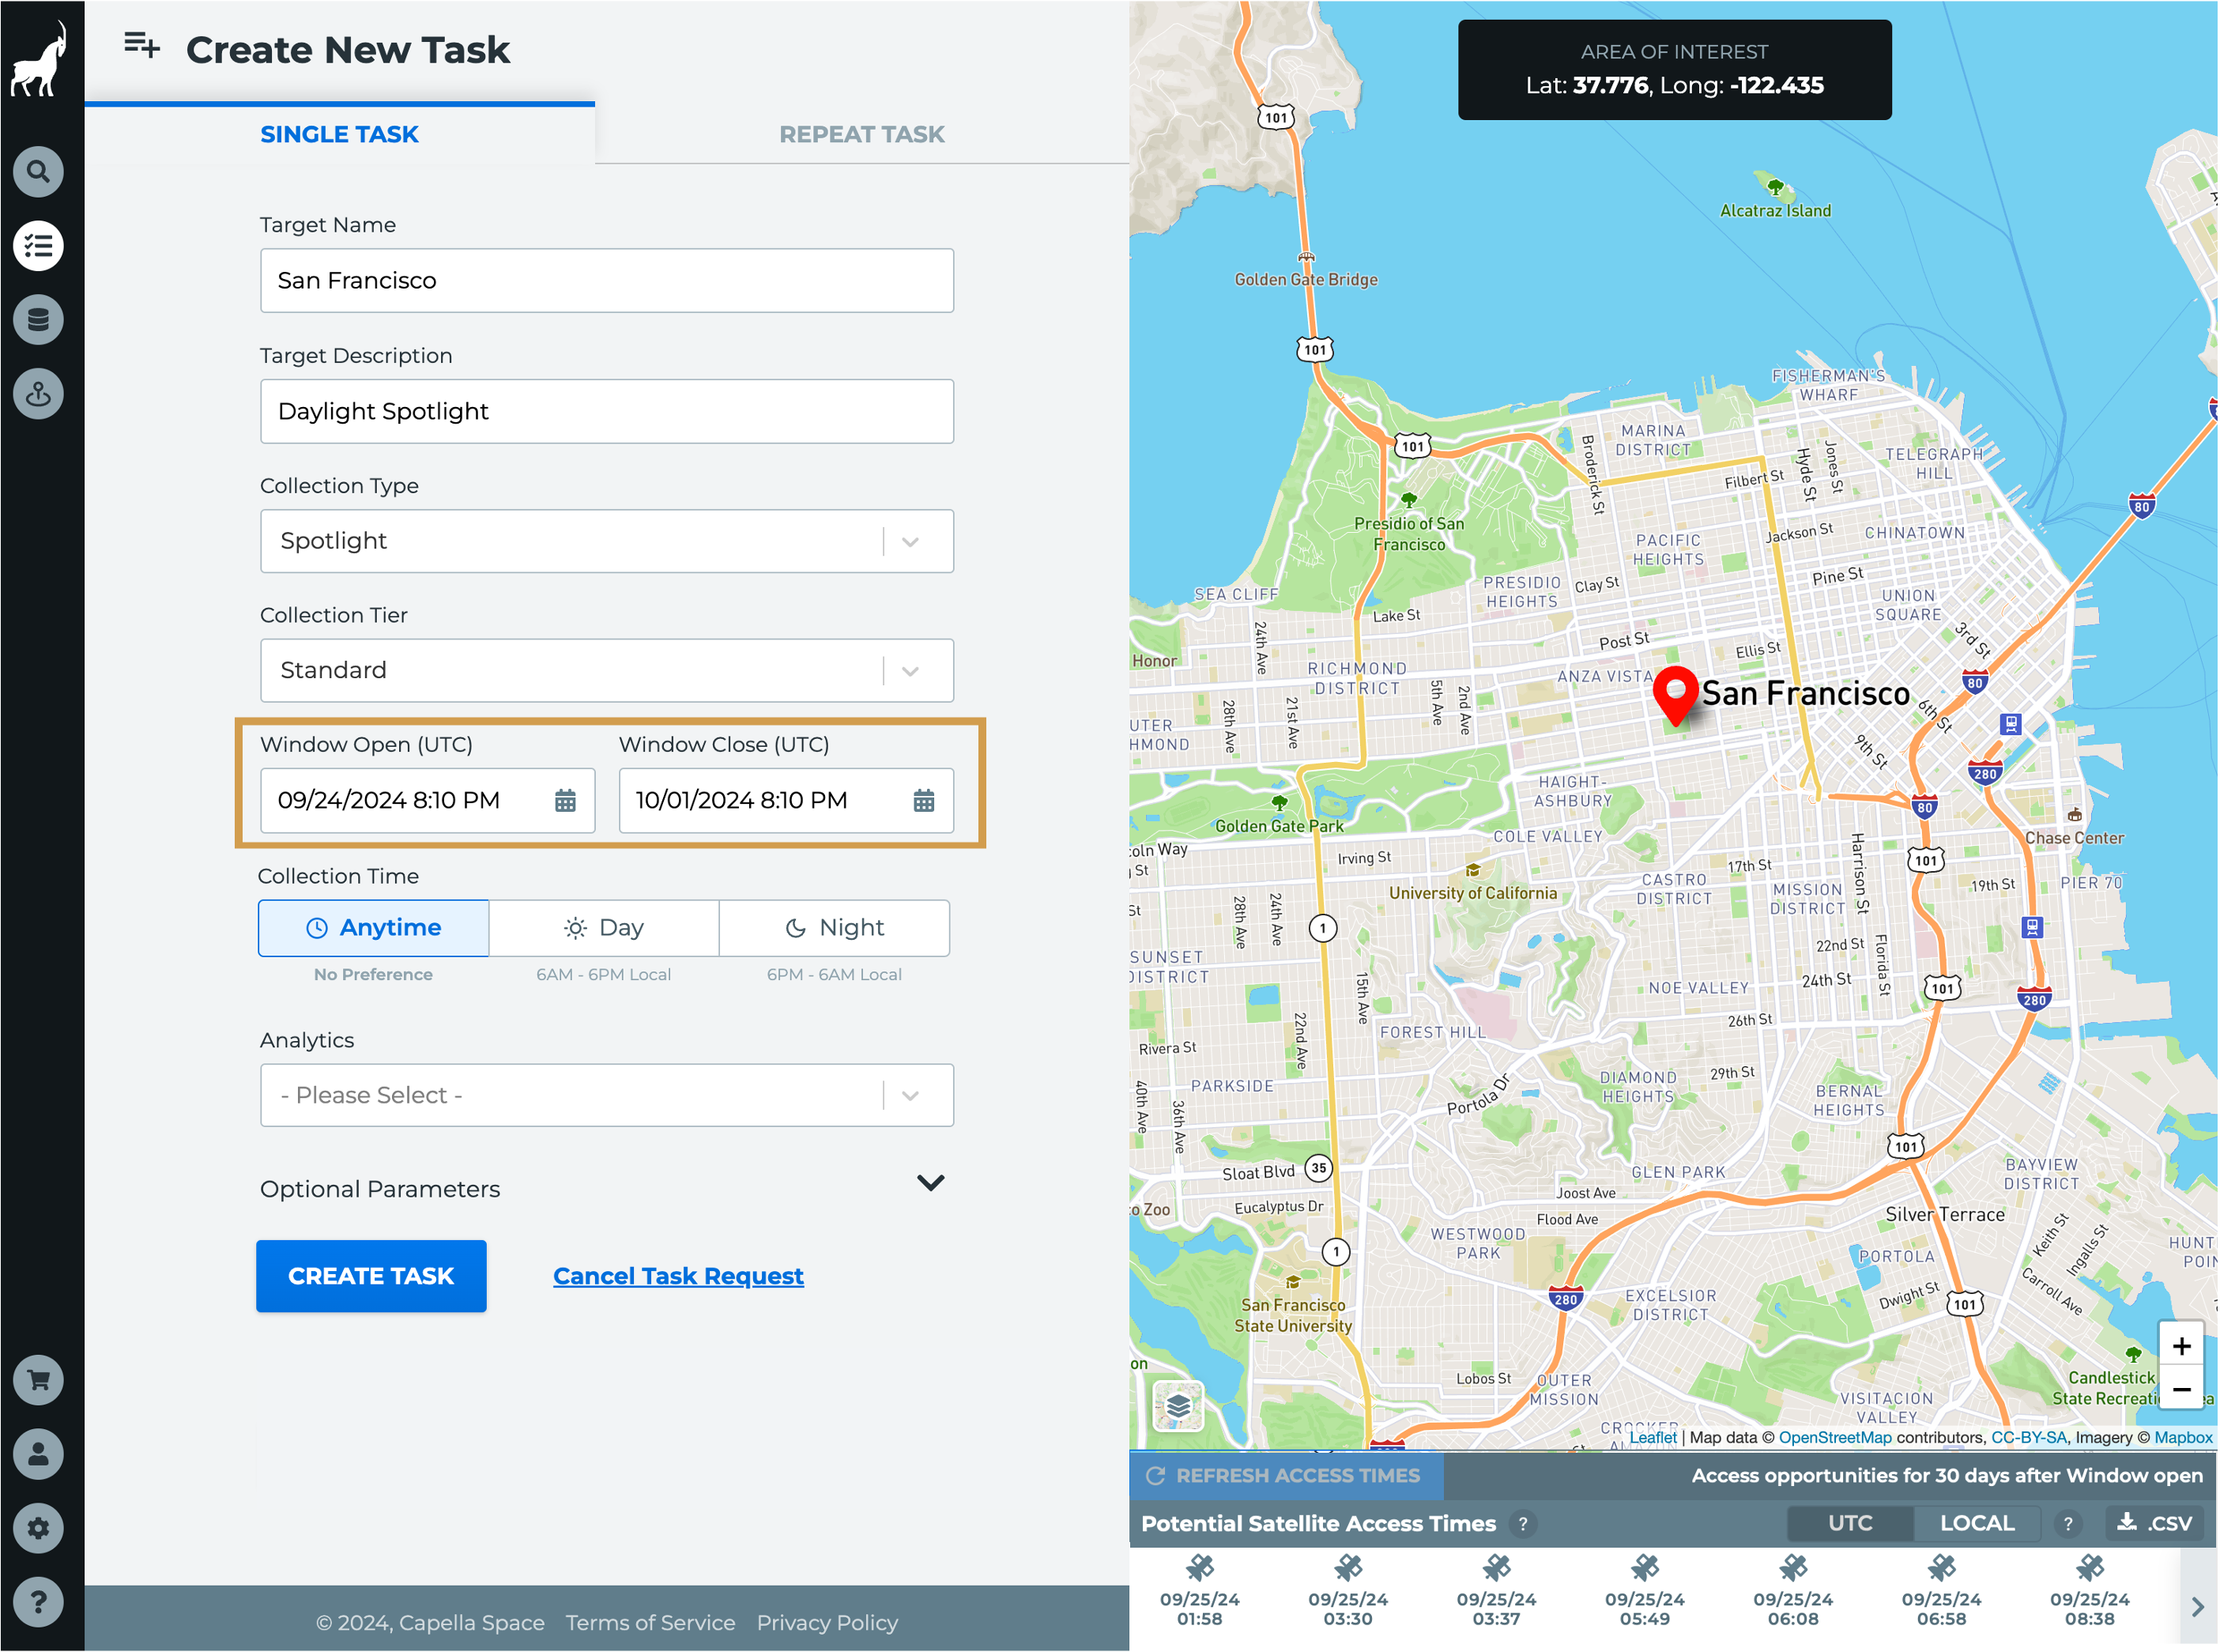
Window Open is the earliest time that you would like the tasking request to begin. Date and times are based on UTC, not local time at the point target. The Window Close date will default to the minimum acquisition window set by the selected Collection Tier, but can be extended beyond that time frame.
7. Set the Collection Time
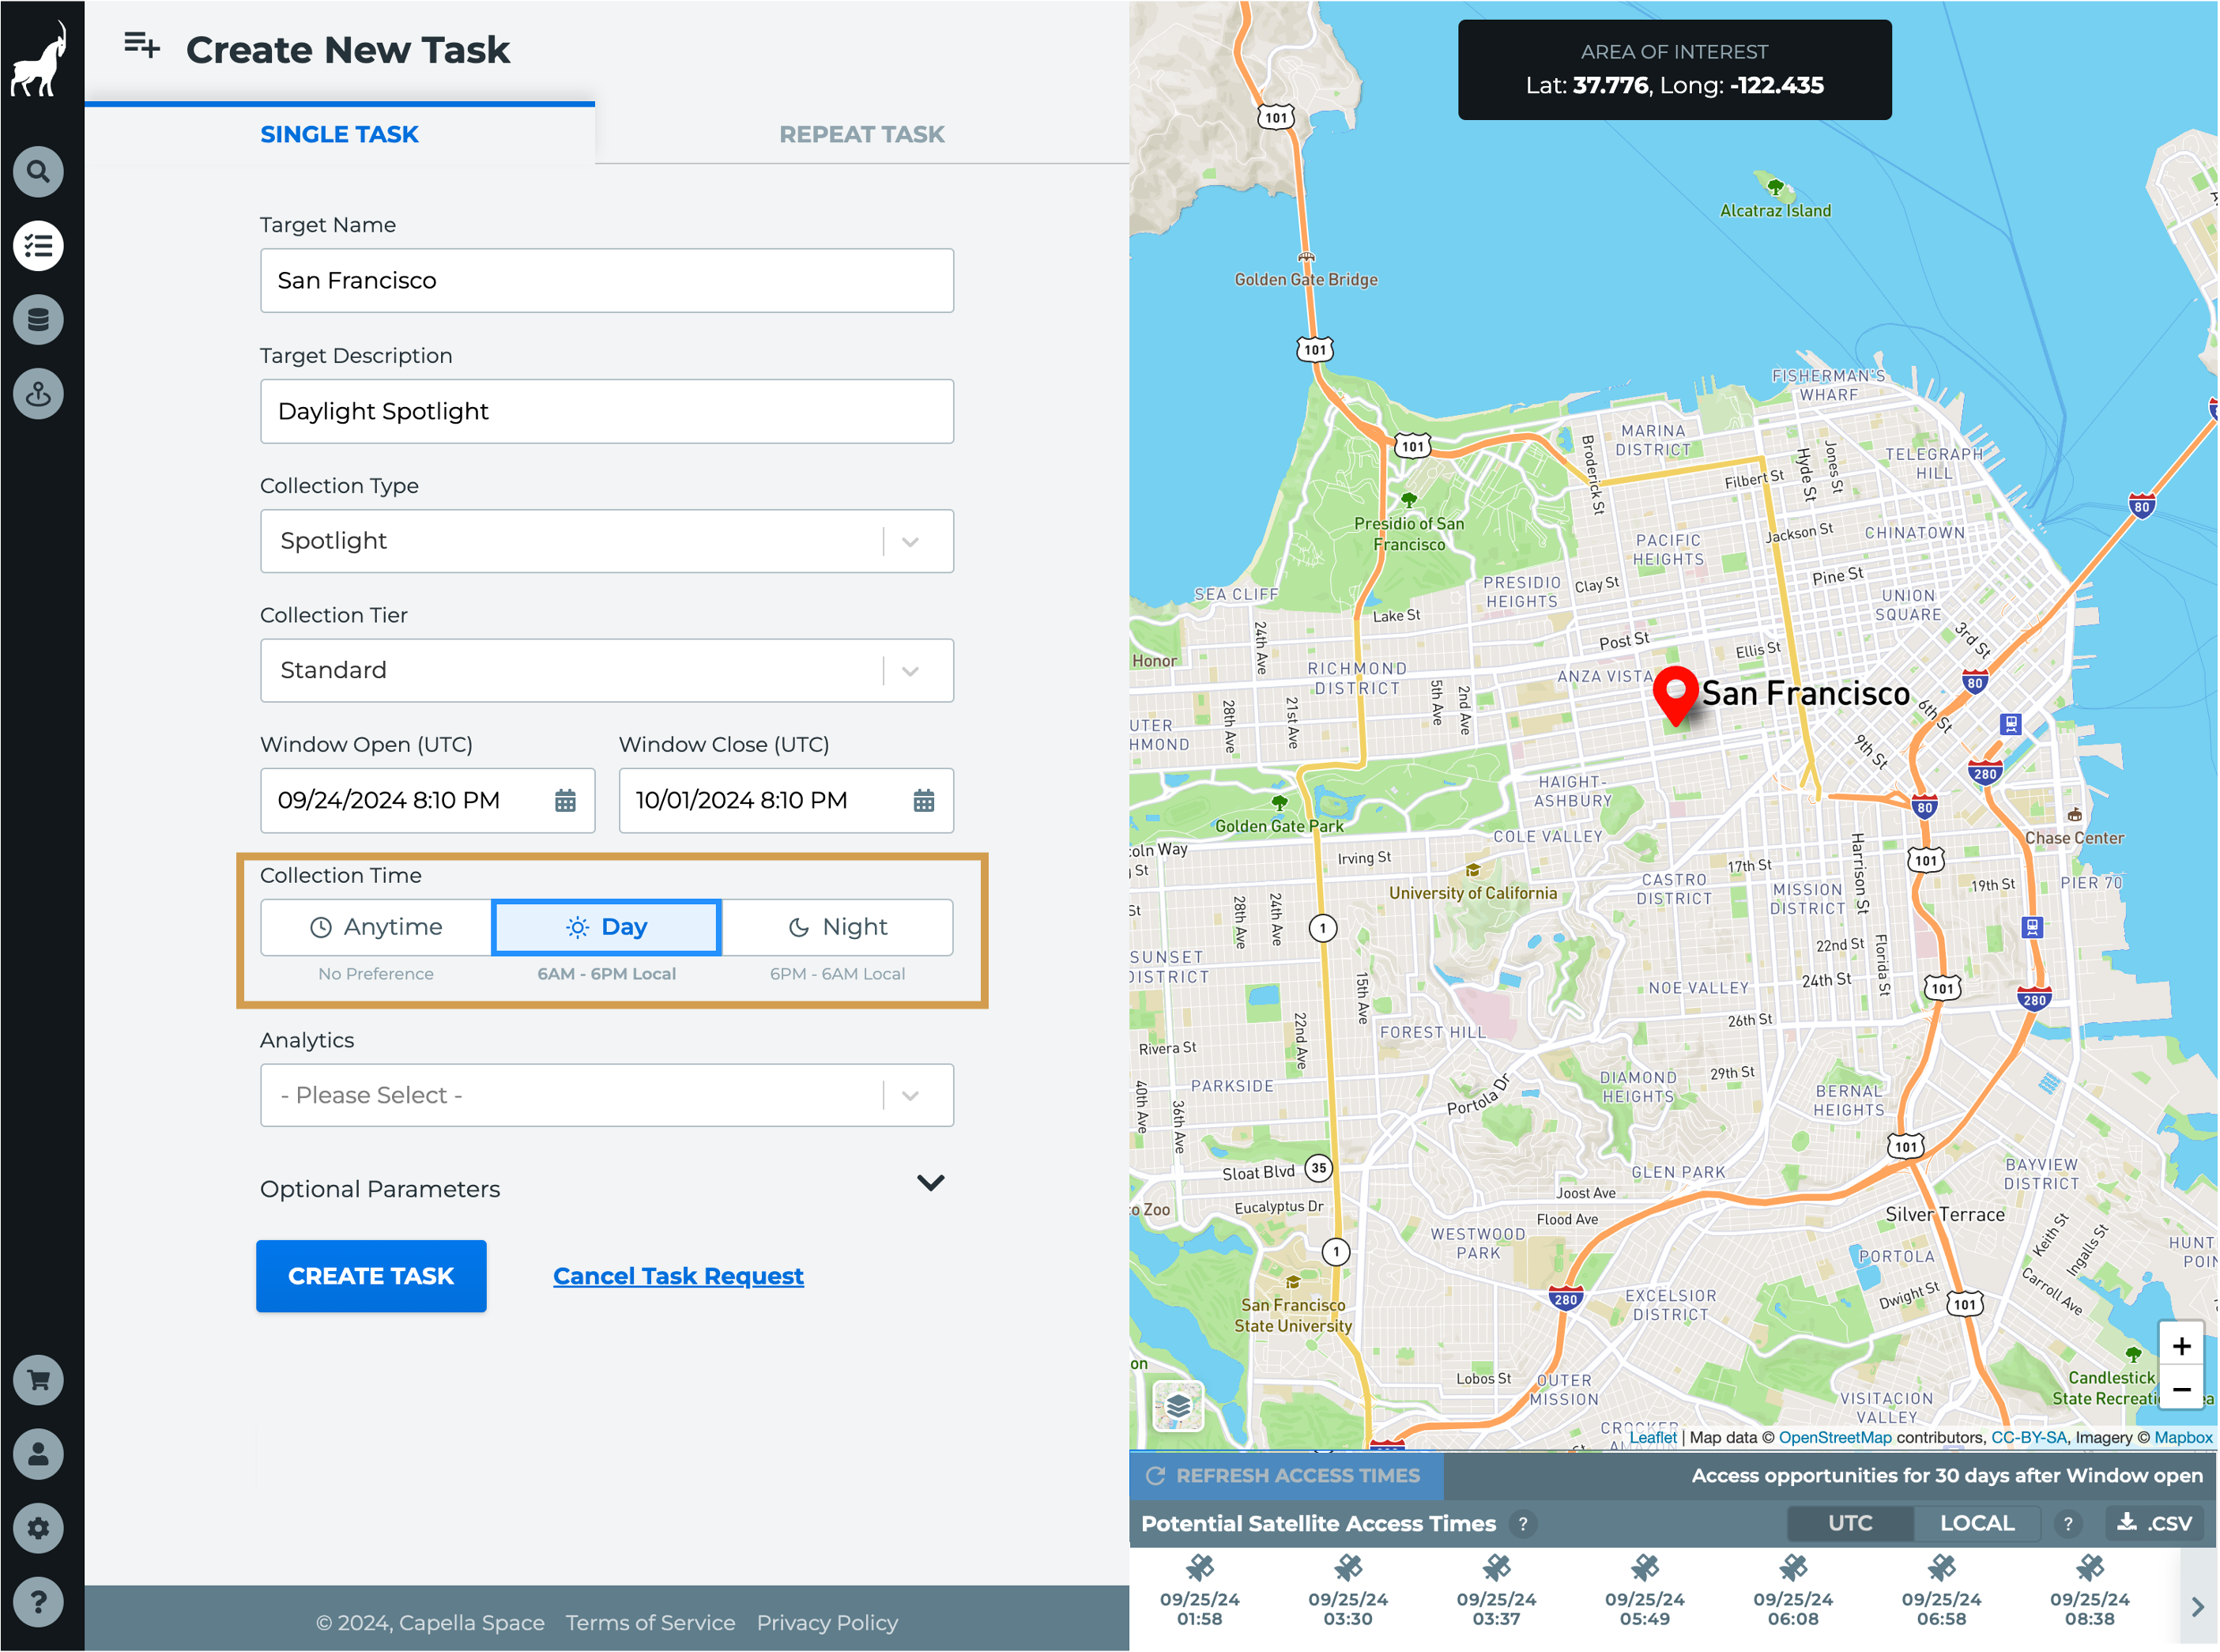
You can designate your tasking request to occur during the night or the day for a single task. Day means the task will be collected between 6am and 6pm (06:00-18:00) local time; Night means the task will be collected between 6pm and 6am (18:00 – 06:00) local time. The default of Anytime enables the tasking request to be scheduled at the next available opportunity.
8. Set any Optional Parameters
Expanding the Optional Parameters tab allows users to further refine their tasking request to meant their use case. Available parameters include the Look Angle range, Orbital Plane, Orbit State, and Observation Direction.
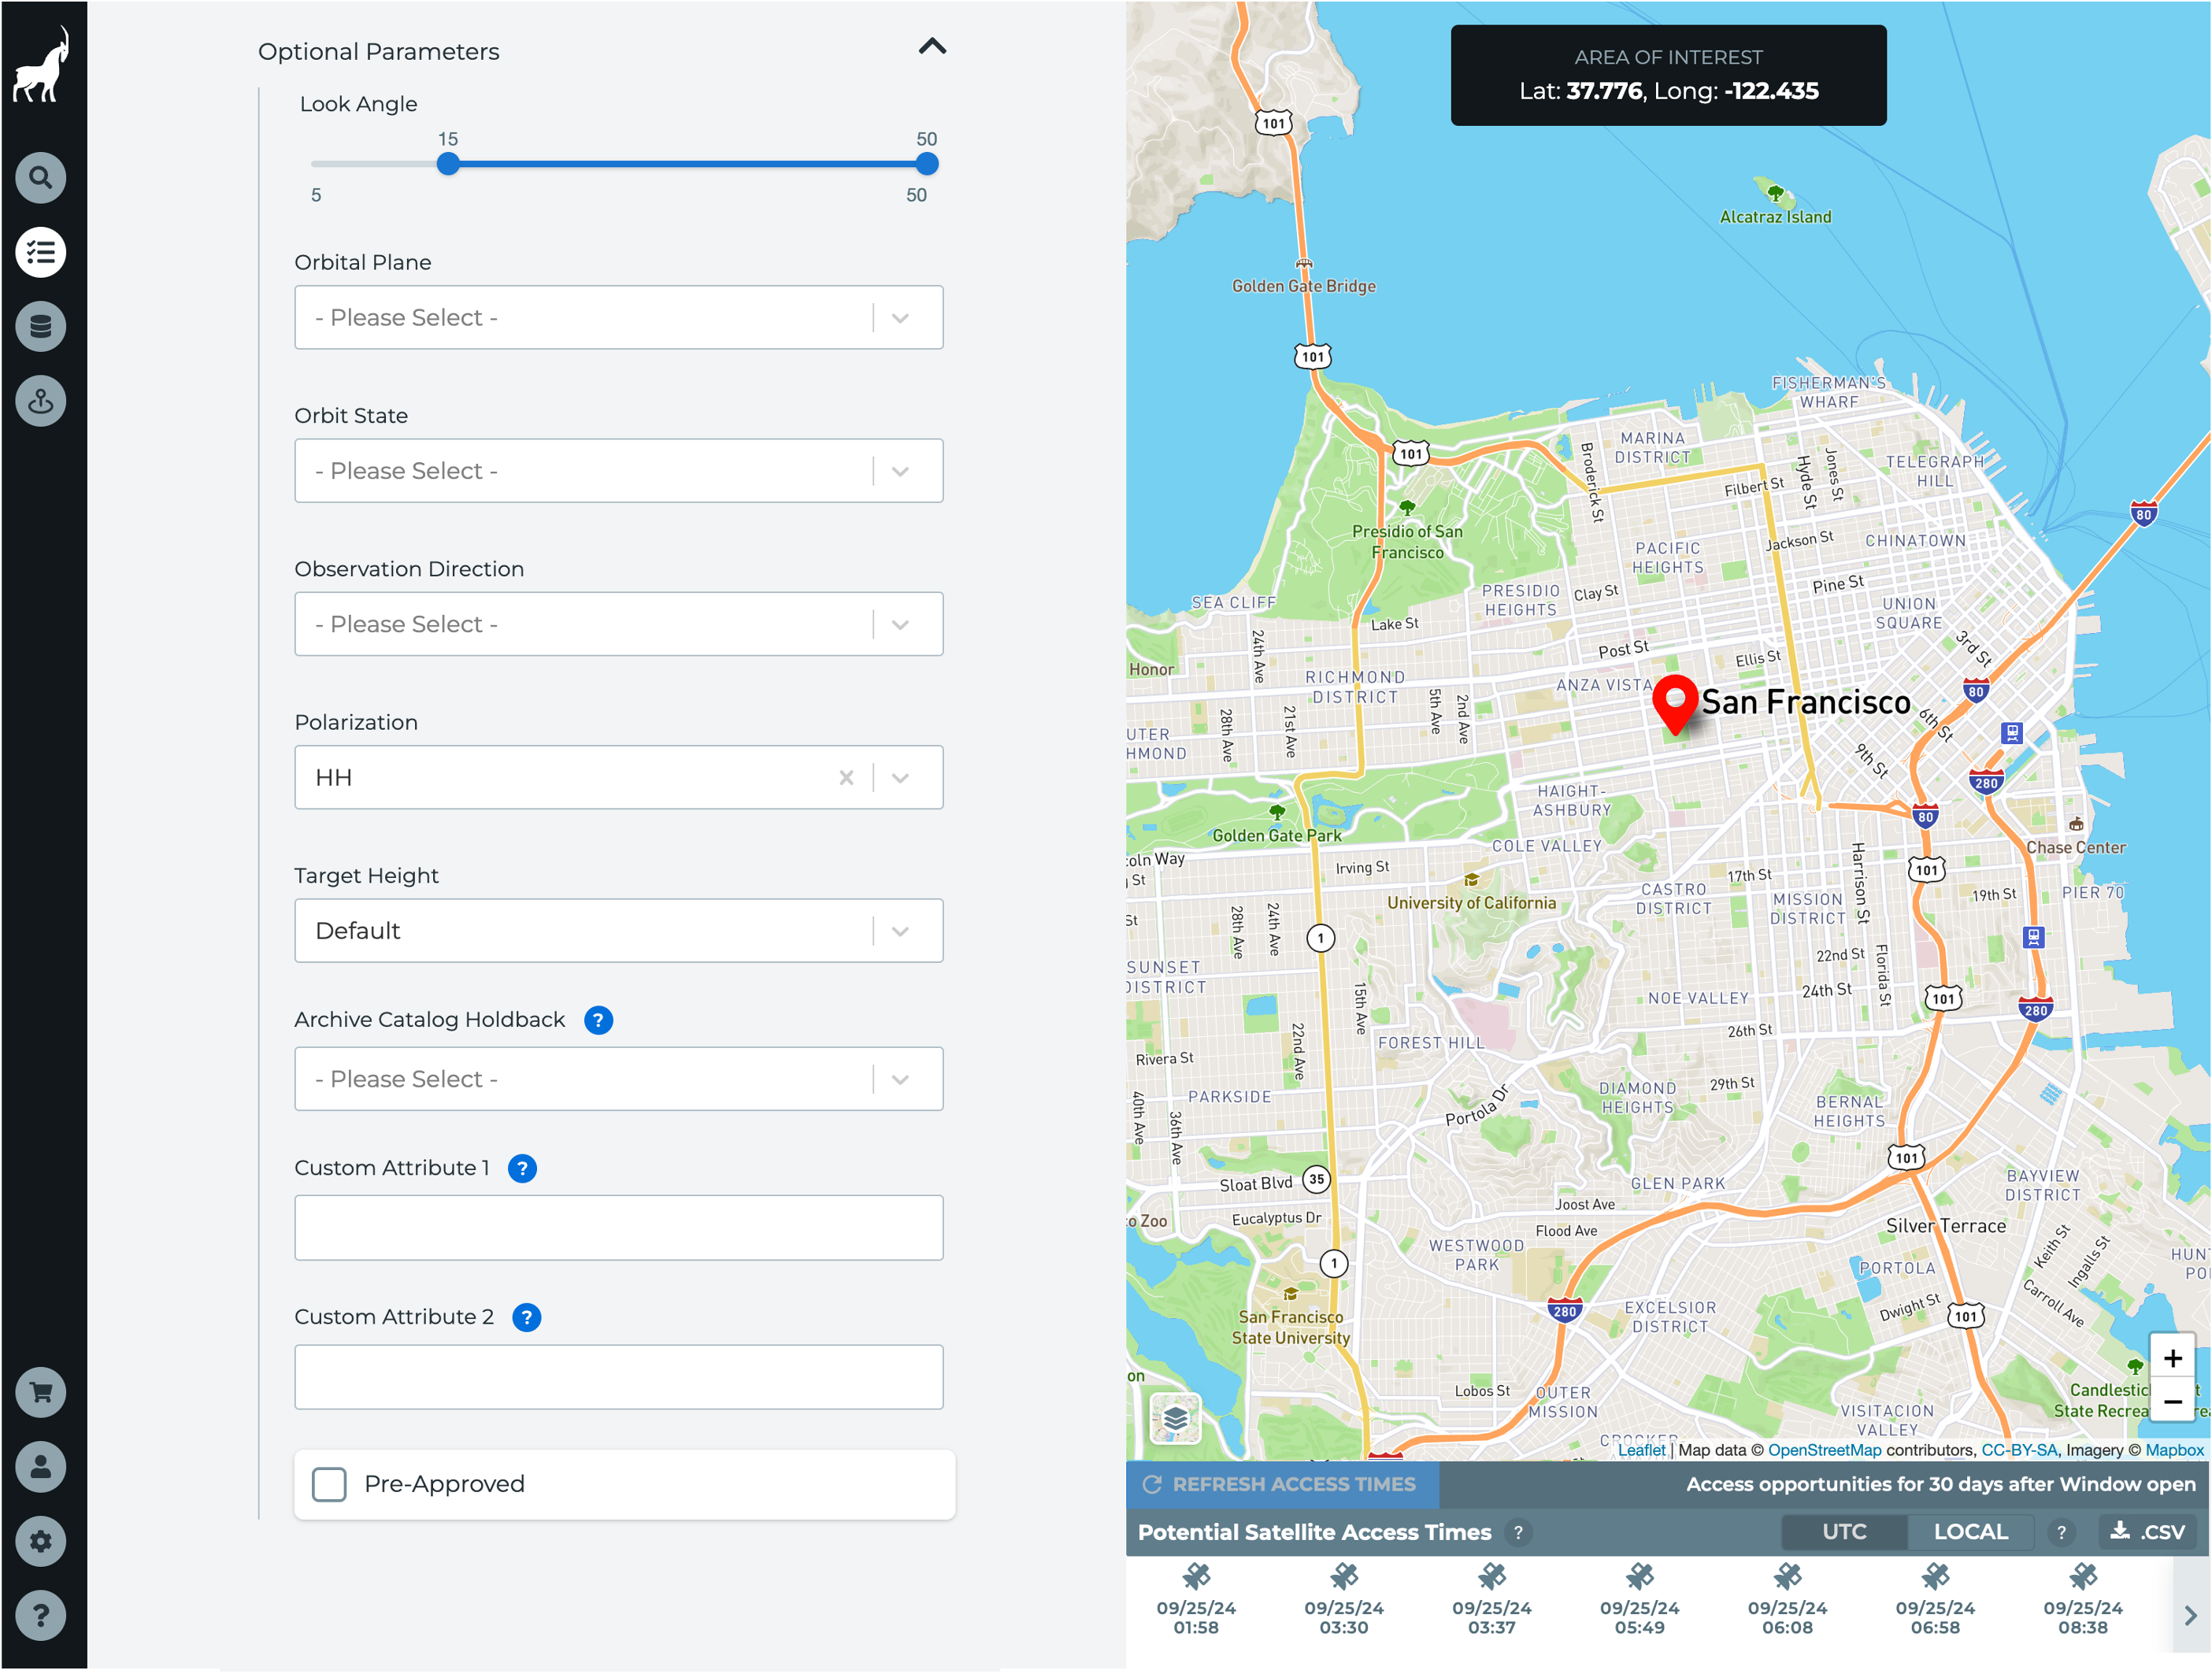
You can also chose to skip the pricing review step outlined in Step 12 by click the Pre-Approved button. This will enable the system to immediately submit your tasking request, regardless of cost.
9. Review potential satellite access times with Mission Awareness
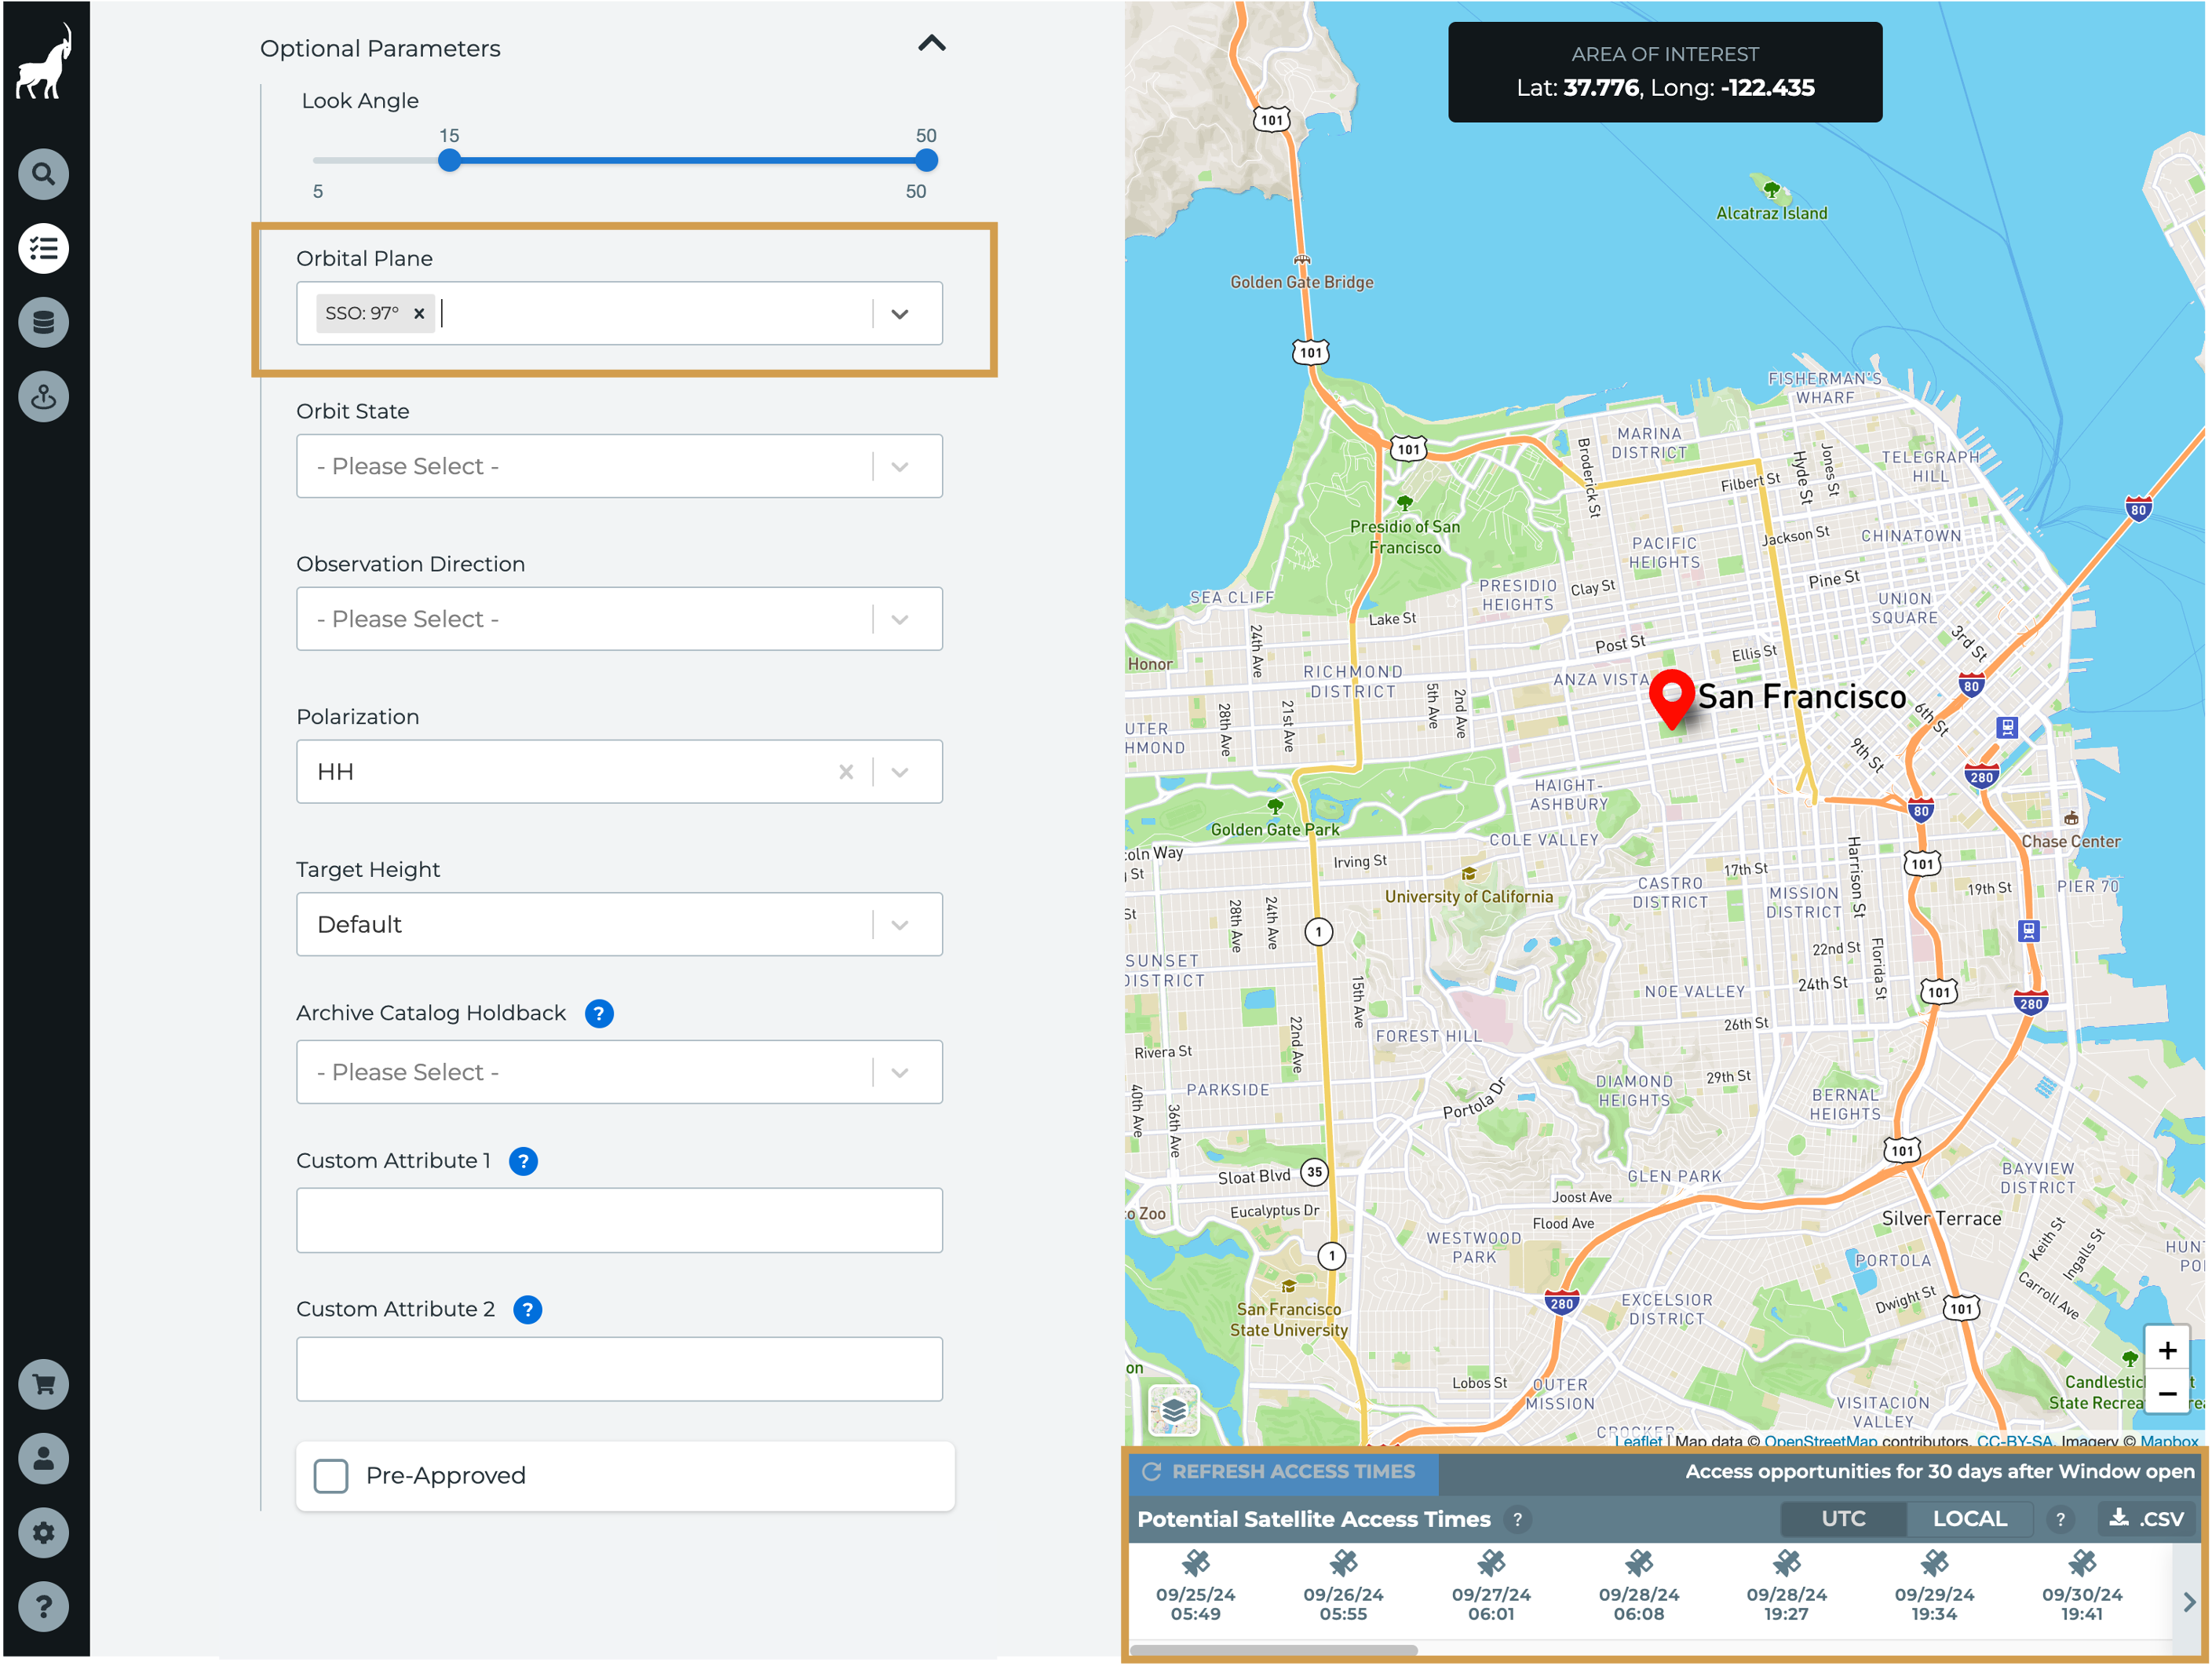
For point target tasking, the Mission Awareness tool generates a list of potential satellite access times up to 30 days from the Window Open date & time. Hovering over one access time will display the potential footprint on the map as well as additional details about the task.
10. Click Create Task
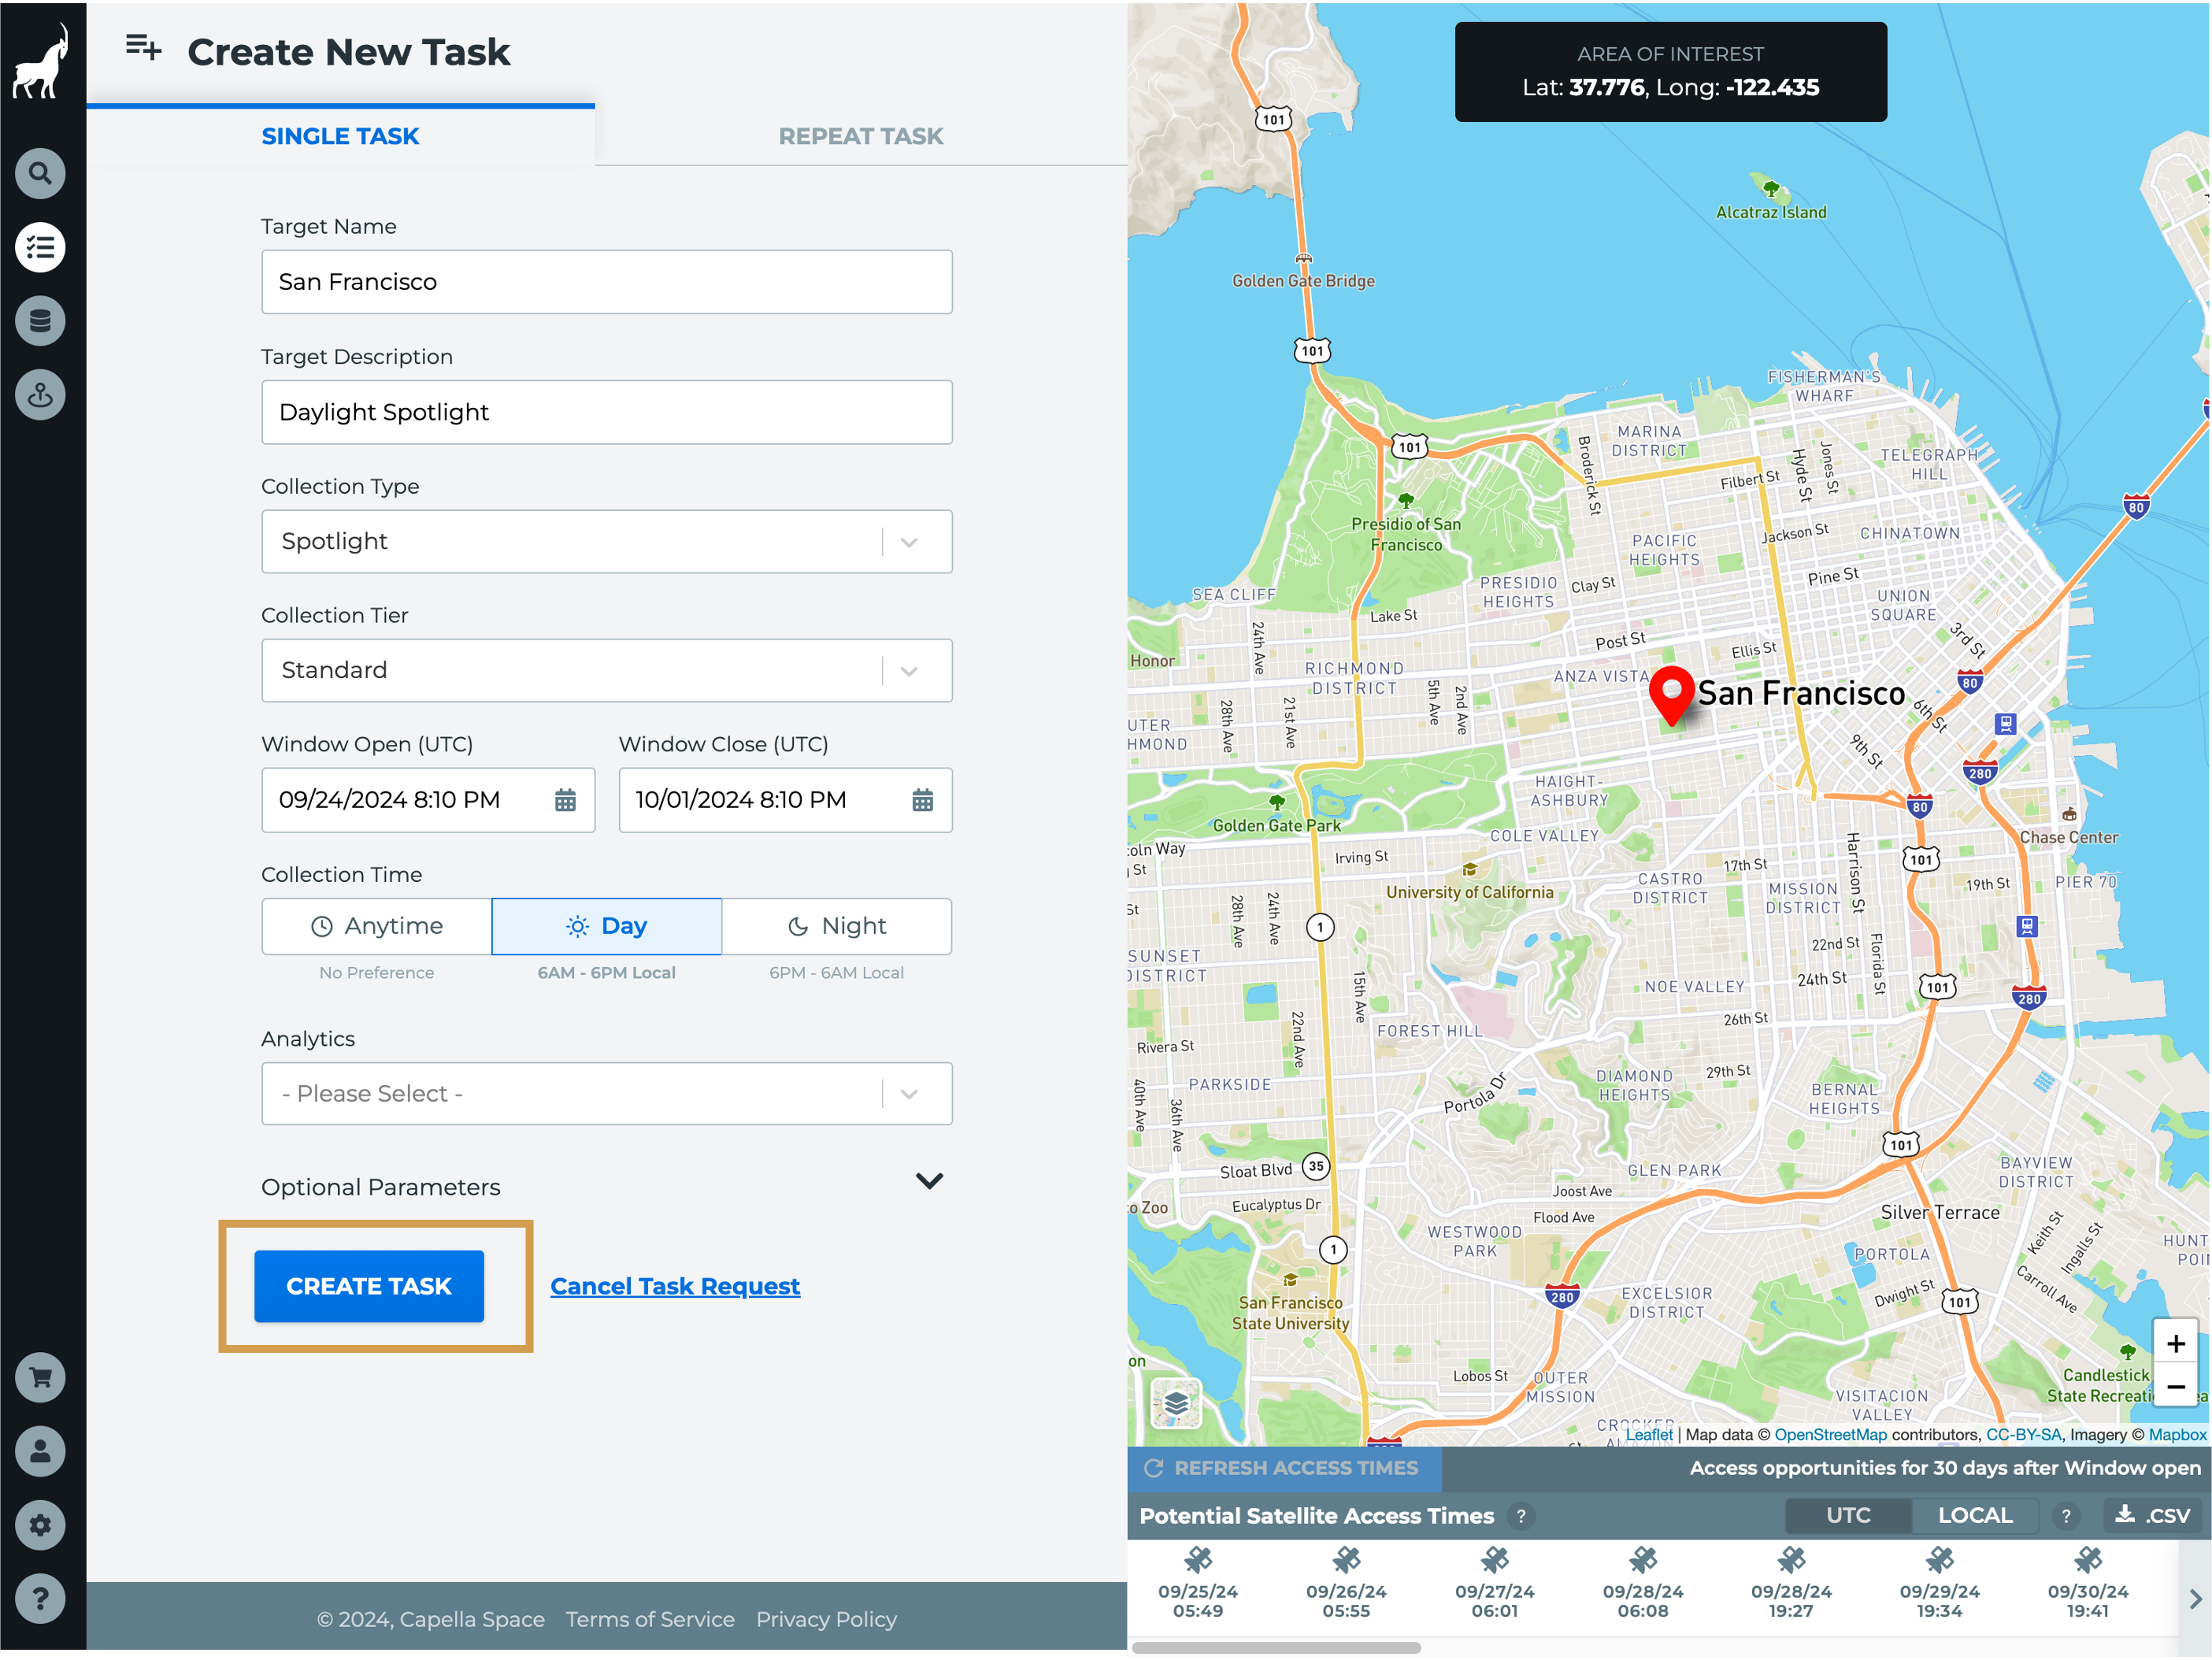
Do not worry, you'll have another opportunity to review the tasking request before it is submitted to the Scheduler.
11. Review the task request information and click Submit New Task, if correct
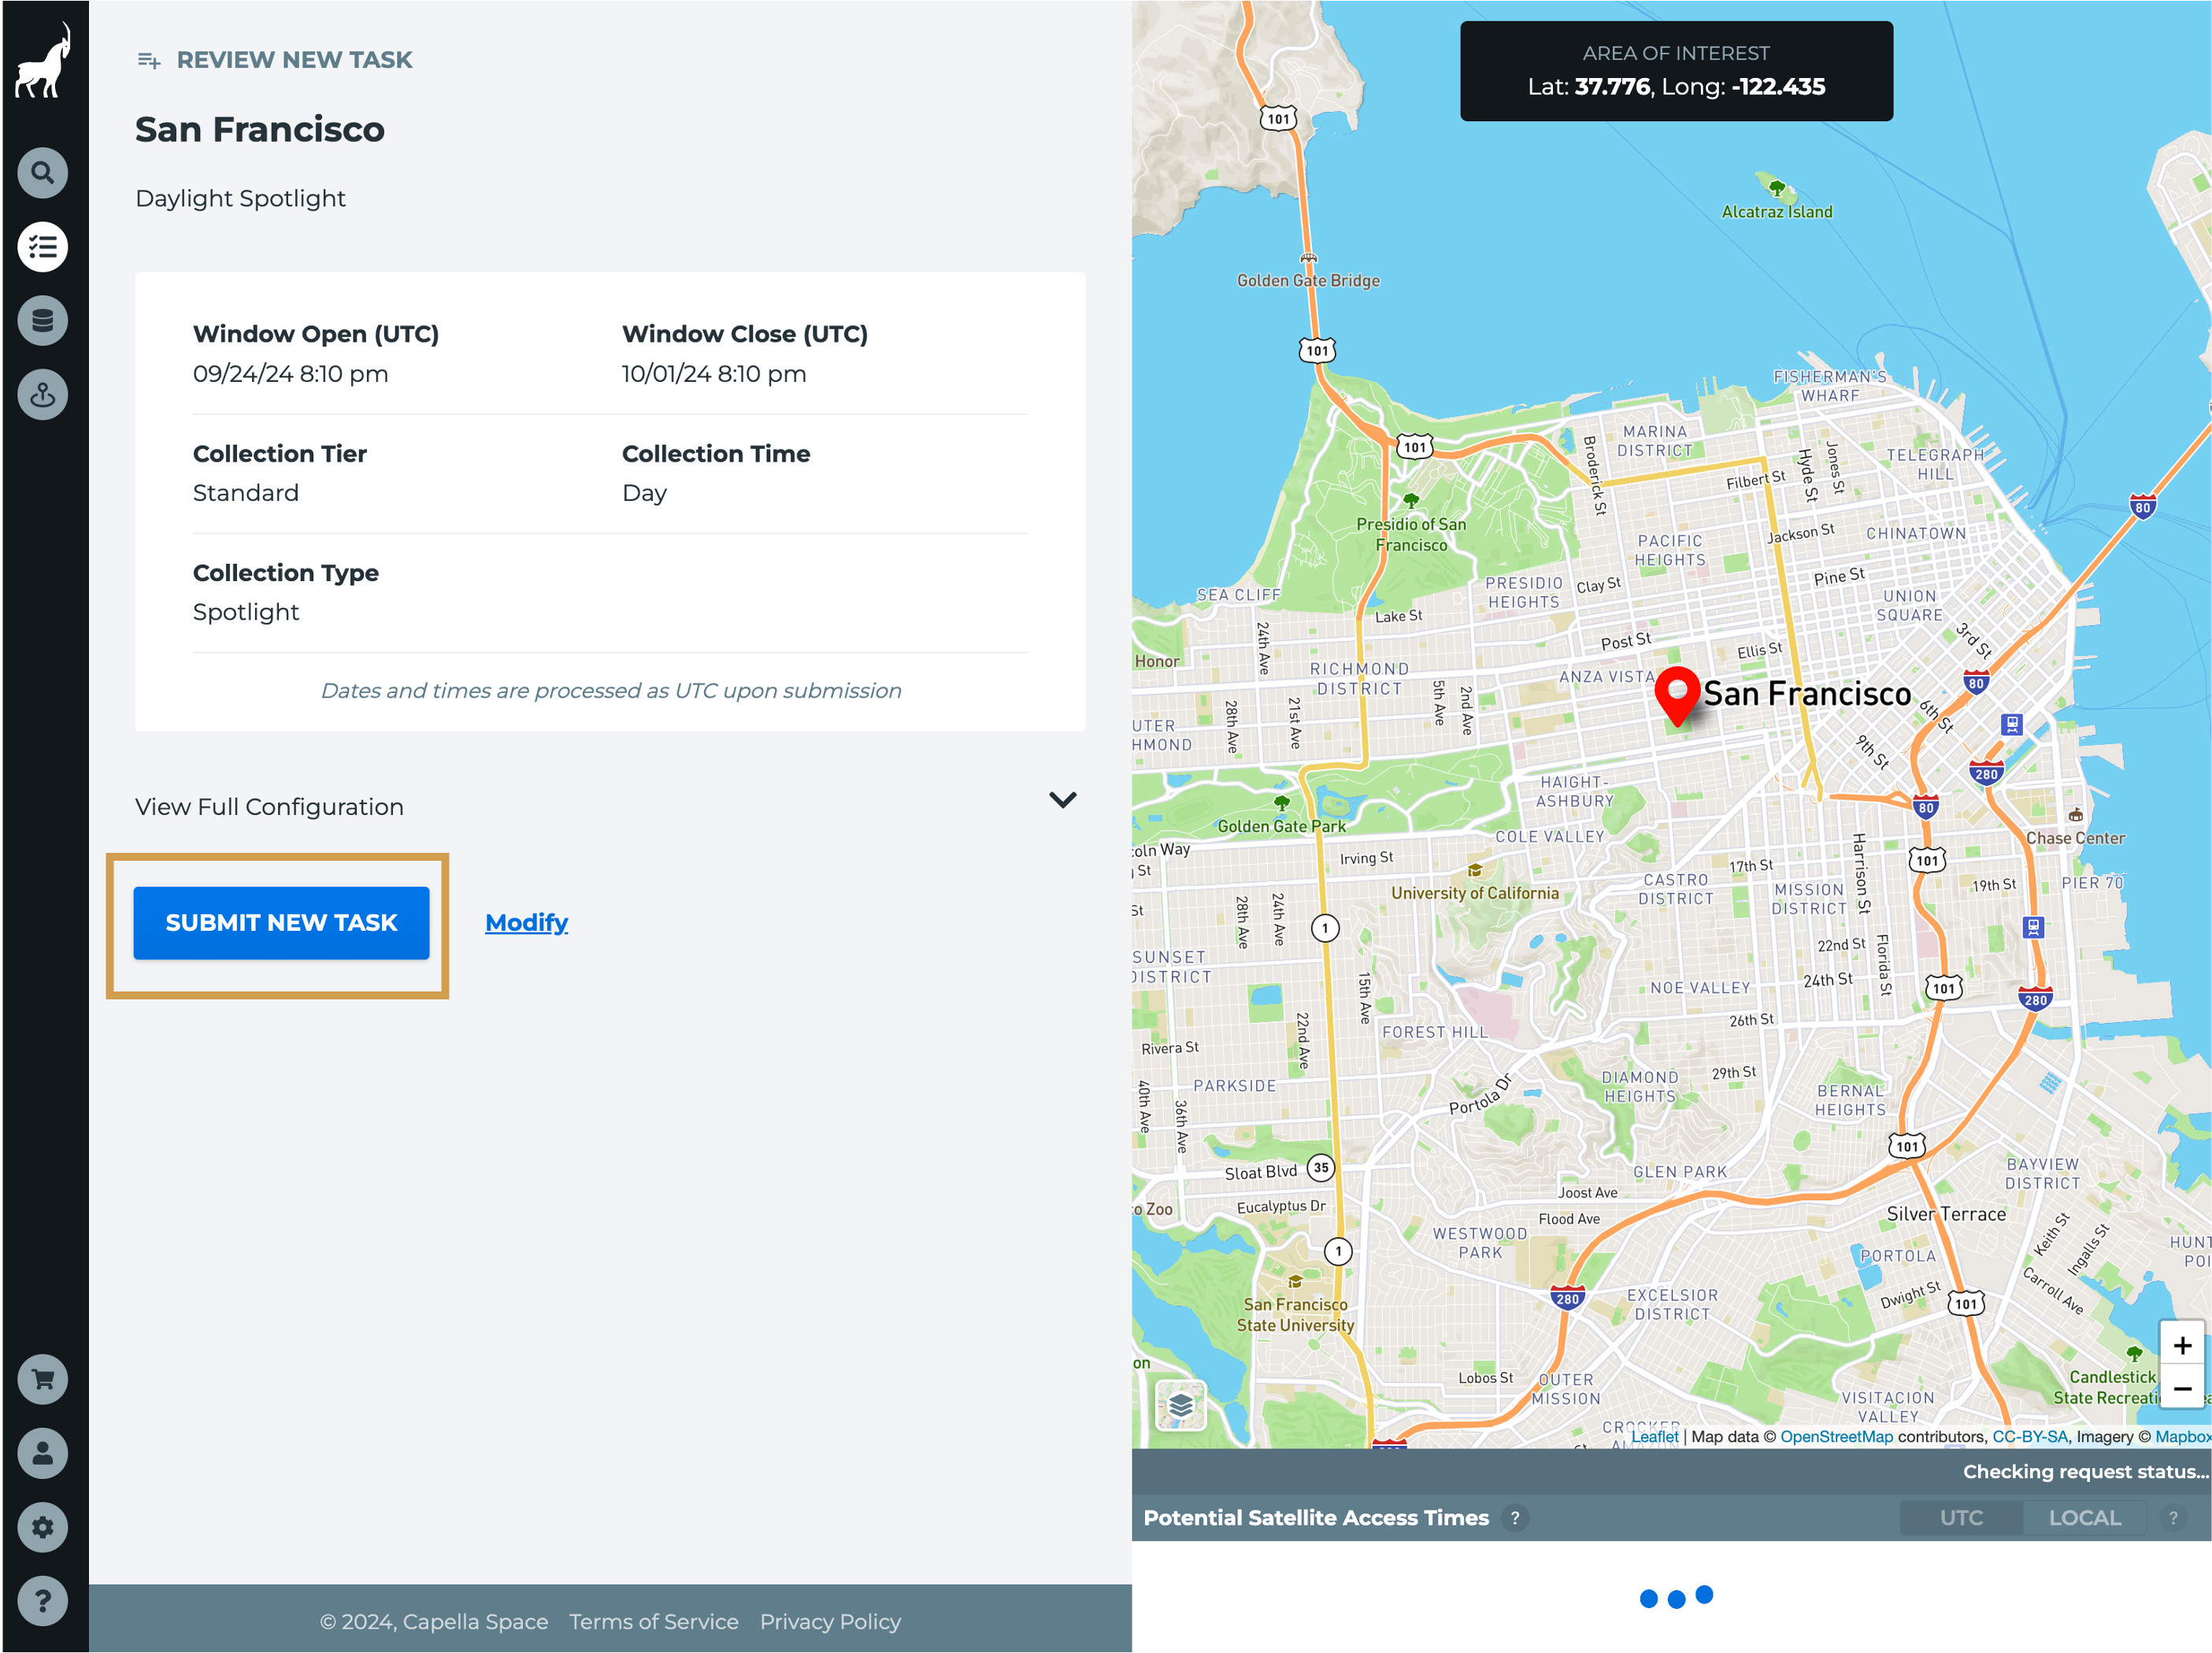
If you need to change any of the information, click the Modify button. Once submitted, the tasking request will move into a Received status while the system calculates the estimated cost, unless you have opted to pre-approve the task.
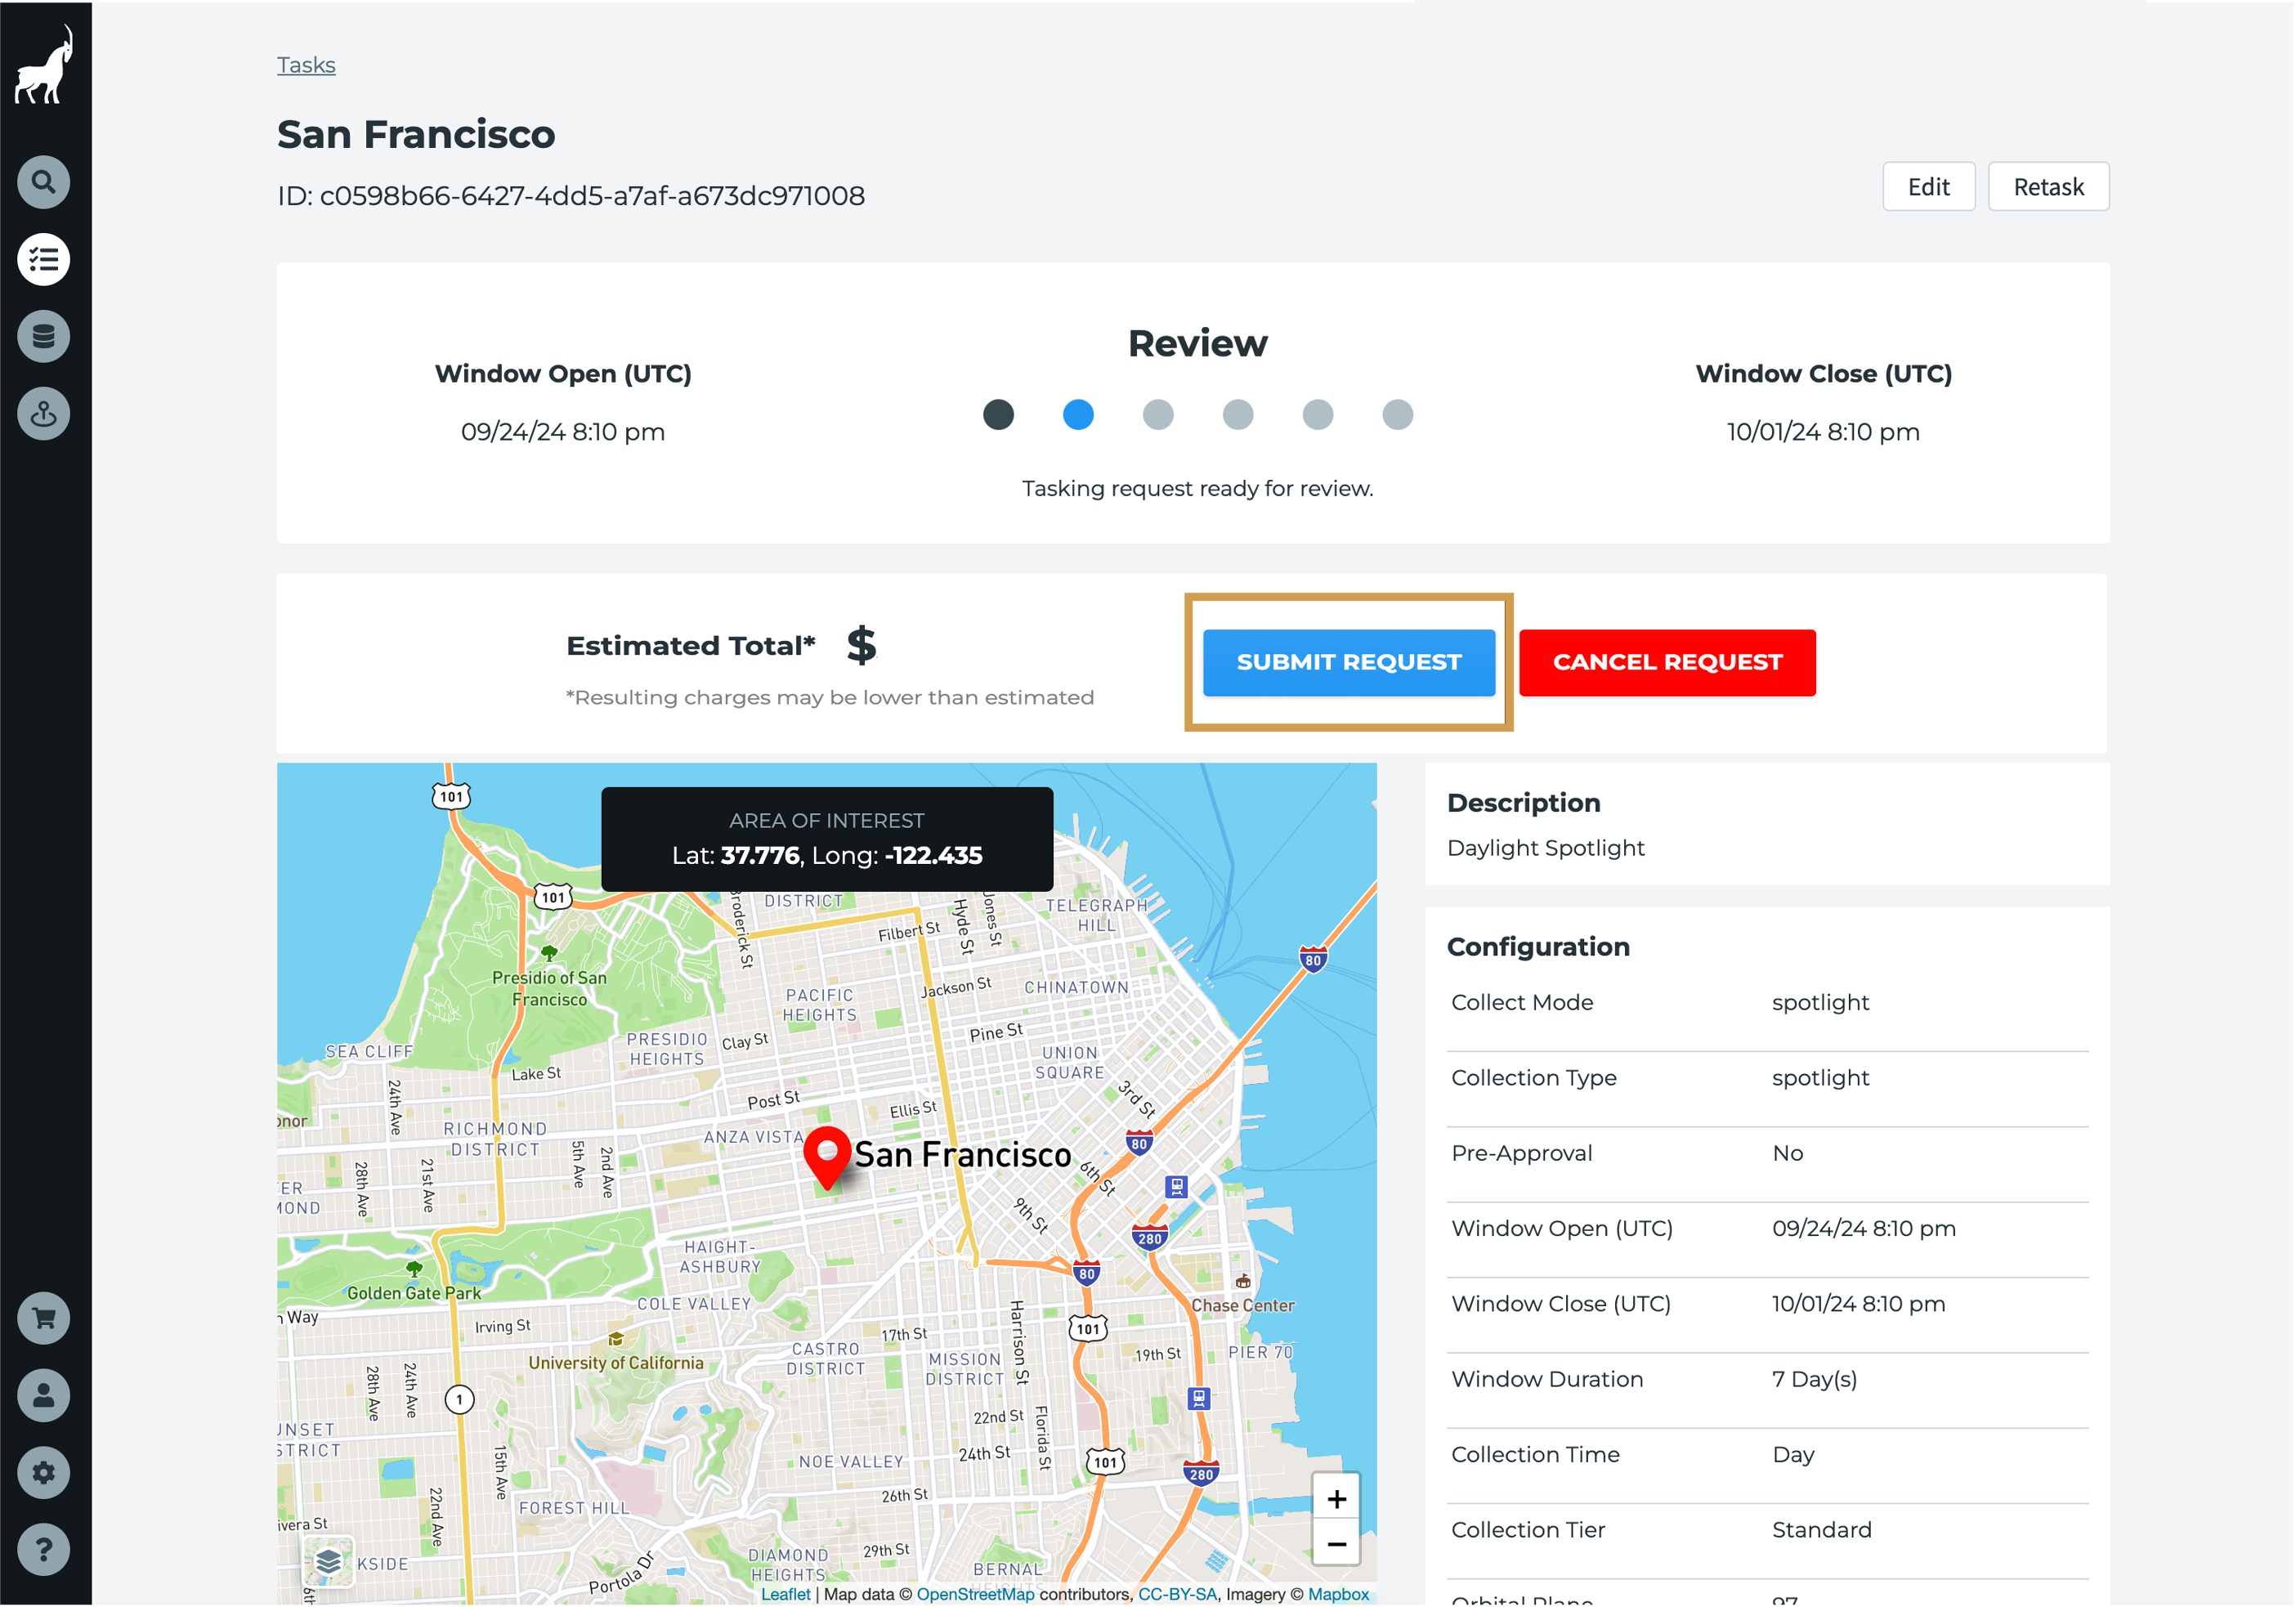
12. Review the cost estimate and click Submit Request
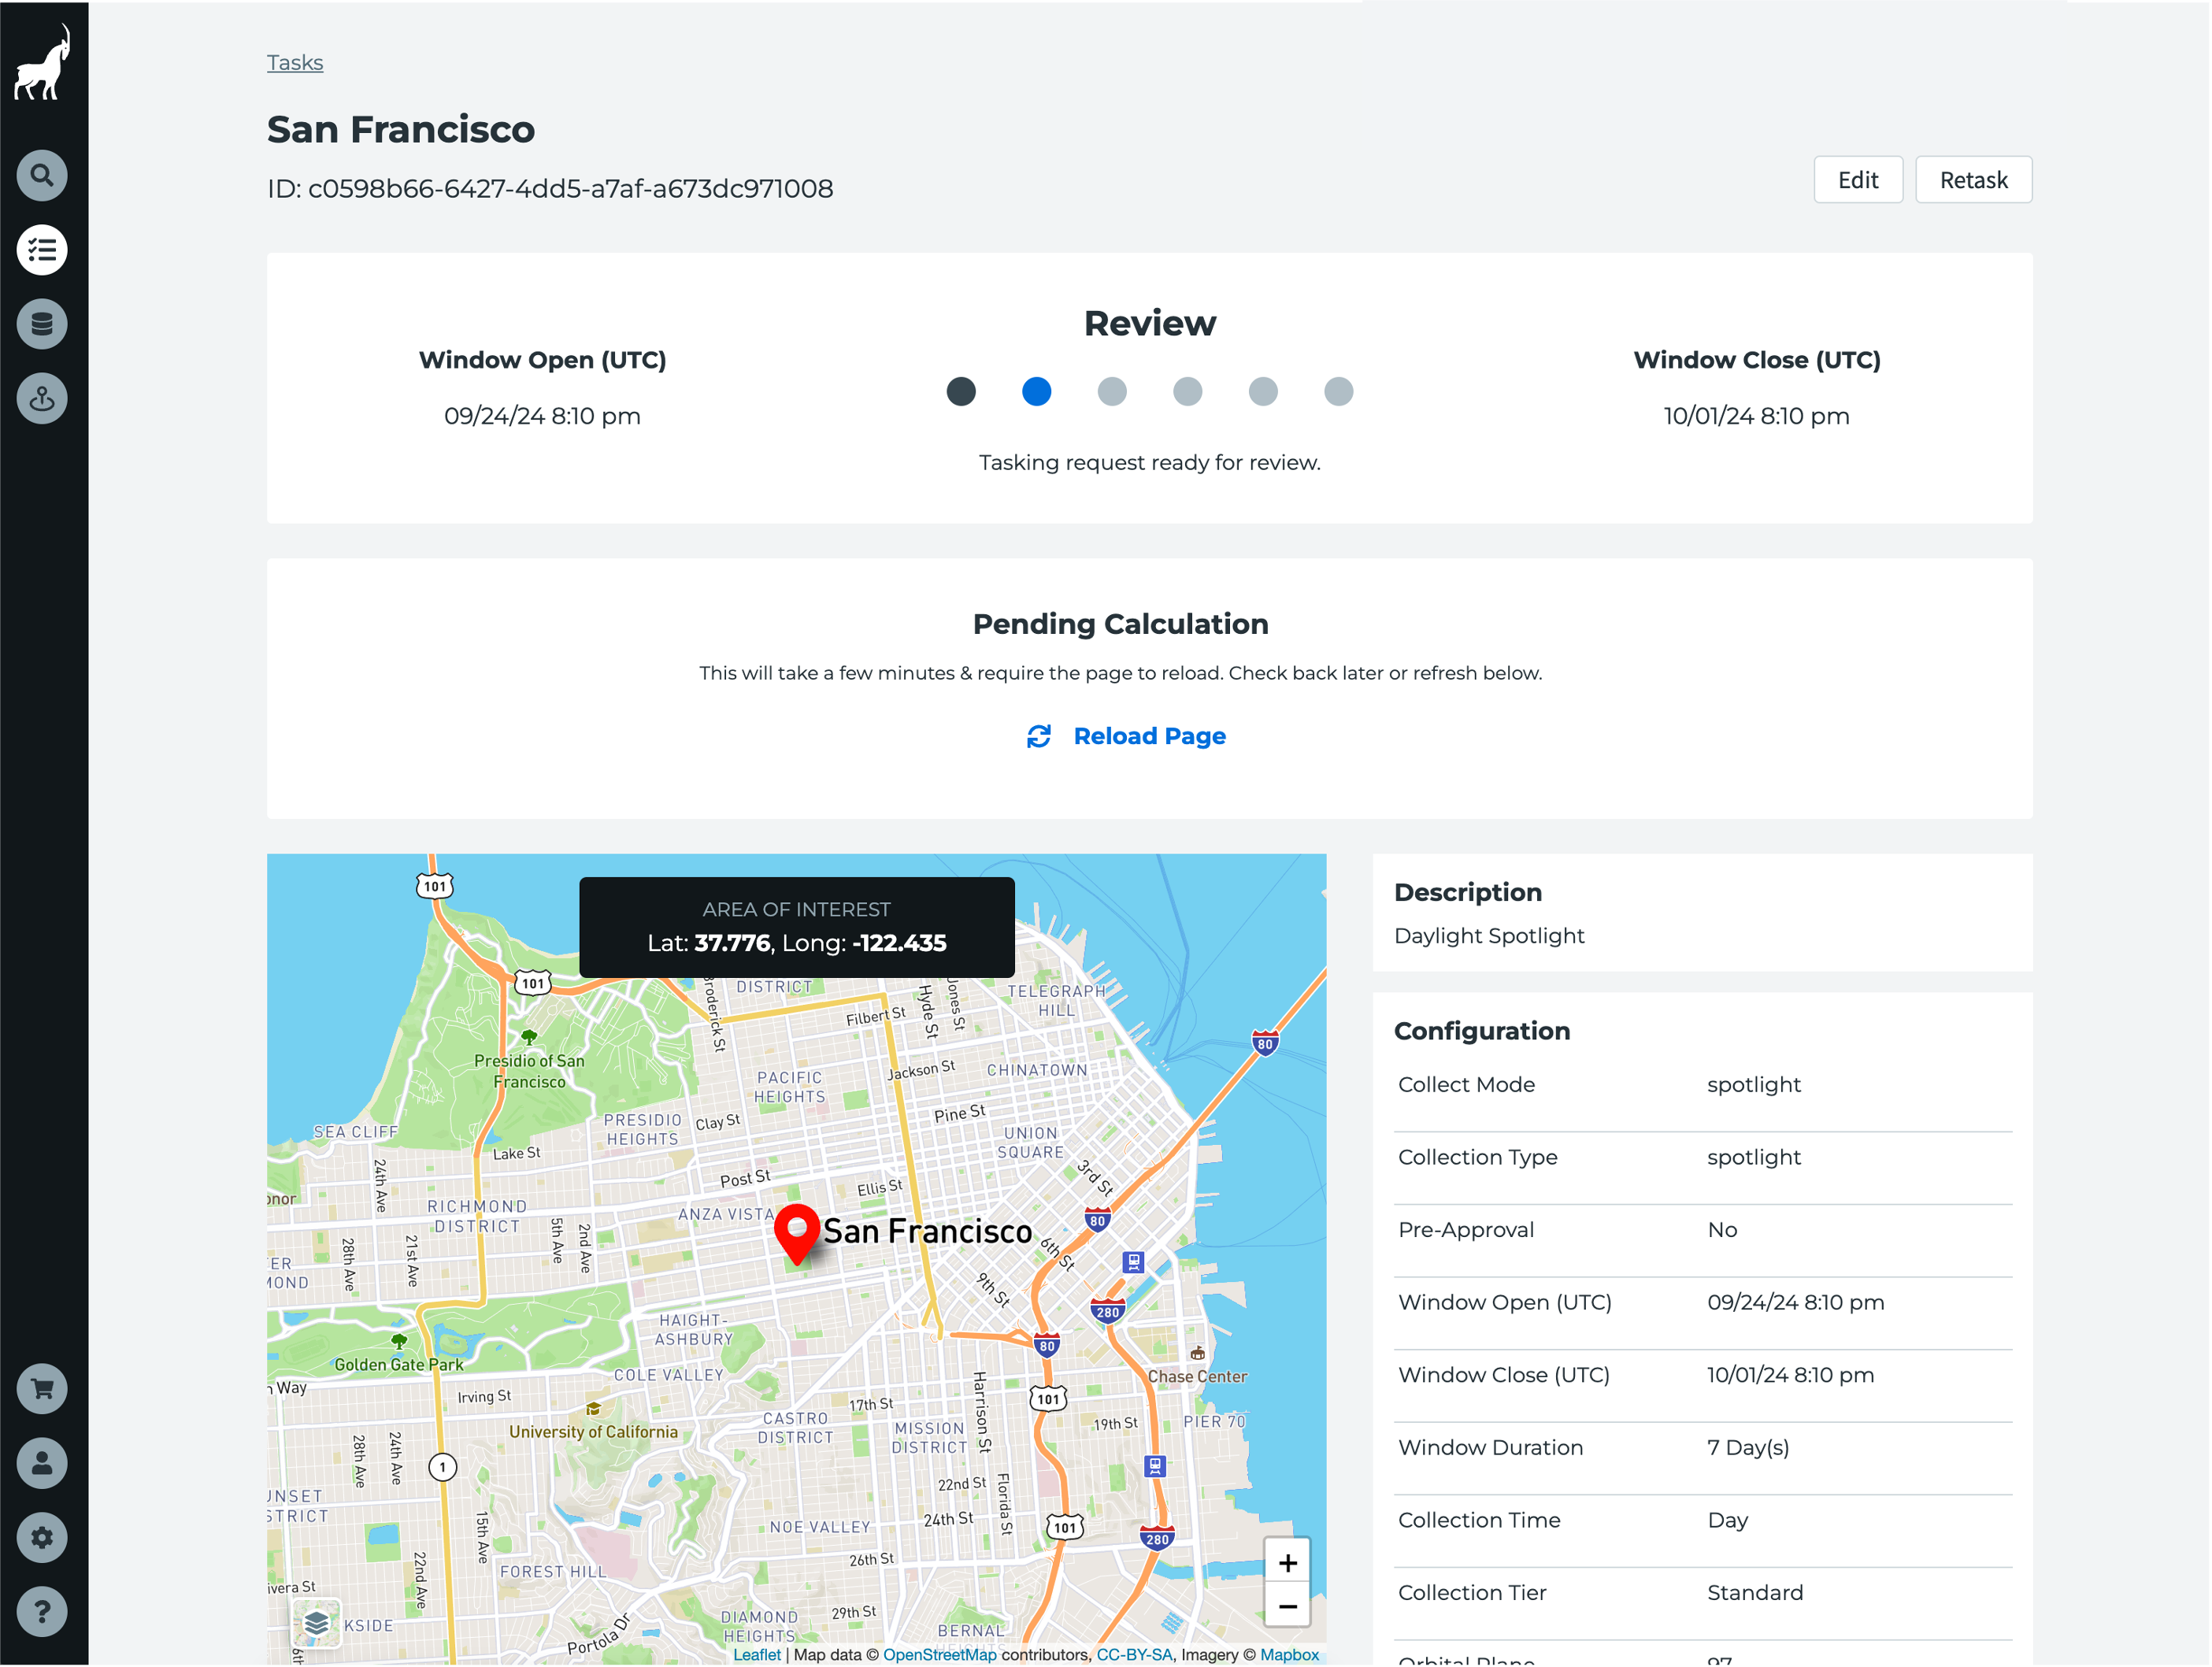
If you did not select pre-approval, you will receive an email when the estimated cost of your tasking request is ready for review. The email will provide you with a link back to the Console.
You can find tasking requests that require approval in the Task List page with a current status of "Review". Click View Details to see the tasking request details and cost estimate. From there, you can Submit or Cancel the tasking request.
13. The scheduling system will run within 15 minutes and either accept or reject your request
If a tasking request is accepted by the system, it will move to an Accepted status until the collect completes. If the Scheduler is uncertain it will be able to fully complete the collection within the timeframe specified by the user, then the task will move to an Active status while collection is attempted. You can continue to follow the progress of your tasking request from the Task Lists page in Console. You will also receive an email when the request is completed and the data is ready for download.
If a request is Rejected, Capella cannot collect the tasking request as specified. This may be due to the fact that the satellite cannot access your target within the specified window or that the schedule is full at that time. If your request conflicts with one or more of your existing requests, you can cancel one those requests and resubmit the new one. Or, you can resubmit the request within a different time period or with different tasking parameters.