Area of Interest (AOI) notifications
AOI Notifications in Capella Console let users define geographic areas of interest and receive email alerts when new public imagery is collected in those regions. This article details how to create, configure, and manage AOIs—including draw/upload options, filter settings, and notification criteria—to monitor strategic areas without constant manual searching.
AOI notifications
Users can create and manage user-defined geographic boundaries or Areas of Interest (AOI). When a new image is published to the Capella Public Archive and is located within an AOI, an email is automatically sent to notify the user of the availability of the new collect. This feature helps Capella users monitor the availability of archive imagery in strategic locations.
The Areas of Interest (AOI) page is accessible from the left-hand navigation bar on the main Console screen.
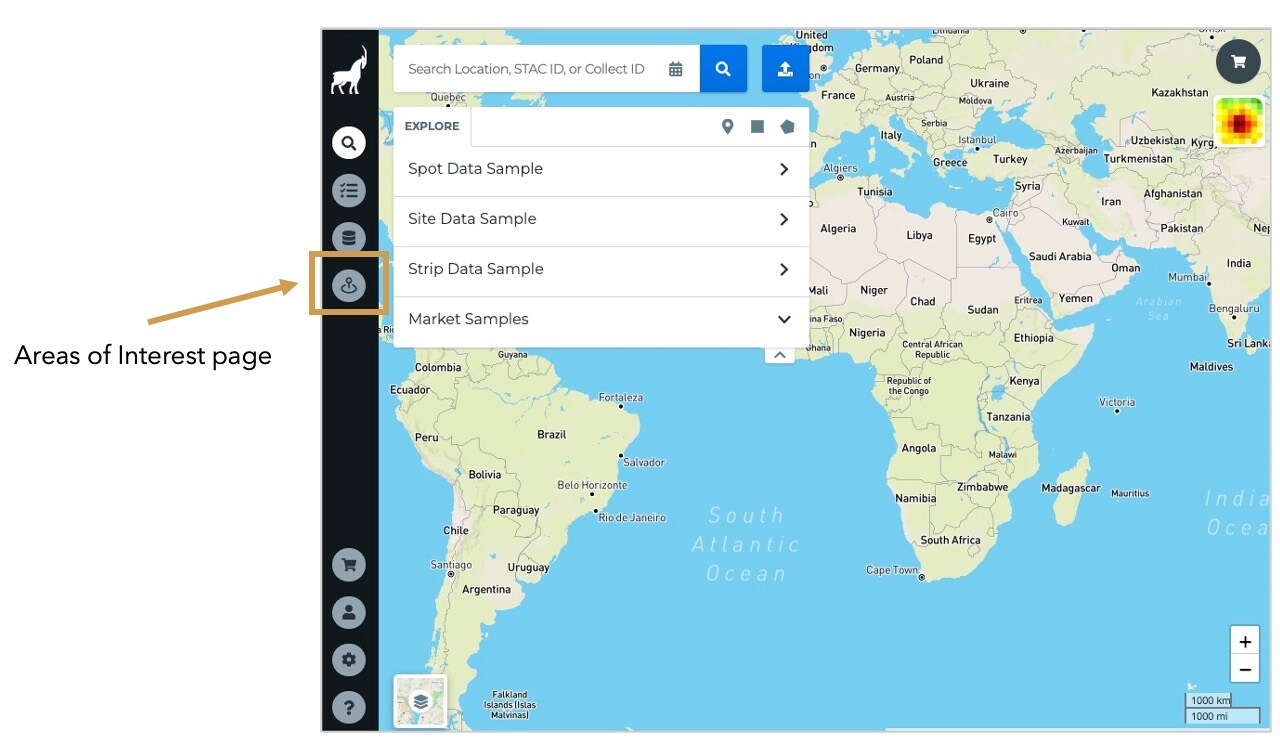
AOI page
On initial load of the AOI Page, the AOI list is blank. AOIs are user-defined and unique to each user.
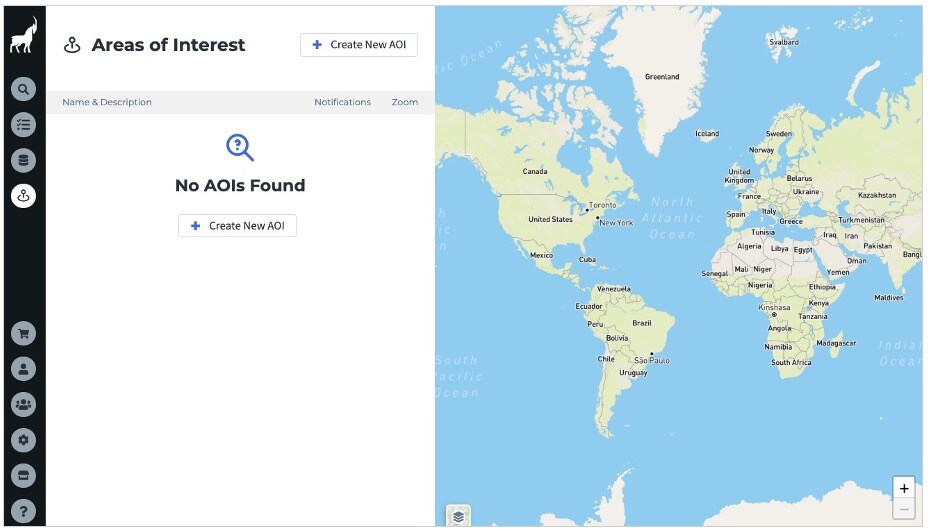
Create New AOI
An AOI can be created by clicking the Create New AOI button in the results list or at the top of the panel and the Create New AOI page is displayed.
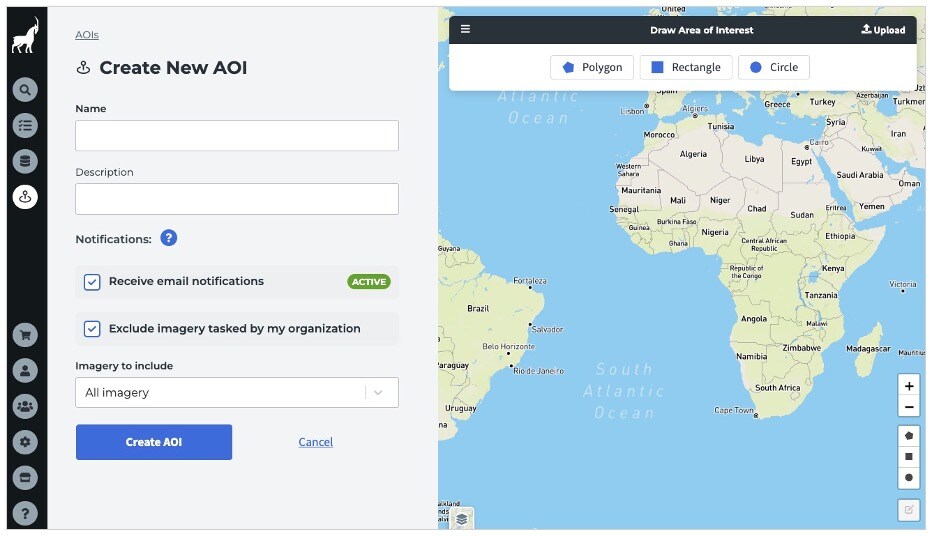
An AOI can have a text Name and Description. Additional AOI properties include:
- Receive email notifications
This is a Boolean value to control the status of the AOI notification. When this value is Active (default), the user will receive an email notification every time a new image published to the public archive intersects the AOI. At least 50% of the area of the new collect must intersect the AOI for the notification to be triggered (partial or sliver intersects are ignored). Setting this property to Inactive allows users to temporarily disable notifications for an AOI, without the need to delete and recreate the AOI.
- Exclude imagery tasked by my own organization
This is a Boolean value to determine whether imagery tasked by the user’s own organization is excluded from the AOI notifications. The default value is TRUE, meaning that the user will only receive notifications for imagery tasked by other organizations.
- Imagery to include
This is a dropdown value that determines what imagery to include in the AOI notifications based on collect date. Some Capella imagery is tasked with archive holdback of either 30-days or 1-year, meaning there can be a delay between when the image was collected and when it appears in the public archive.
All imagery (default)
All imagery will be included in the AOI notifications regardless of collect date – includes all imagery with archive holdback.
Within the last 30 days
Only the most recent collects will be included in the AOI notifications – all imagery with archive holdback will be ignored.
Within the last 1 year
Only data within the last year will be included in the AOI notifications – imagery with 30-day archive holdback is included but imagery with 1-year archive holdback will be ignored.
An AOI also has a Geometry and can be defined as a Polygon, Rectangle, or Circle using the Draw Area of Interest buttons at the top of the map or by uploading an existing geometry in a GeoJSON file via the Upload button.

Polygon
Click the Polygon button and then click on the map to define each vertex to include in the shape. Re-click the starting point to close the polygon.
Rectangle
Click the Rectangle button then click on the map and drag to define the rectangle boundary.
Circle
Click the Circle button then click on the map and drag to define the circle boundary.
Upload
Click to browse to an existing geometry file (.geojson, json) or drag and drop to upload.
(The geometry widgets at the bottom right of the map can also be used to define or edit the AOI geometry)
NOTE: for very large AOIs greater than 5M sq km in size, an additional warning is displayed:
Warning: AOI size is greater than 5M sq km. You may receive an excessive number of email notifications for large AOIs. Consider reducing your AOI size or click Create AOI to continue.
This is simply a warning to the user that very large AOIs may result in an excessive number of email notifications. Large AOIs are allowed, but users should be aware before moving forward.
Once the AOI geometry and all attributes are defined, the AOI can be created by clicking the Create AOI button.
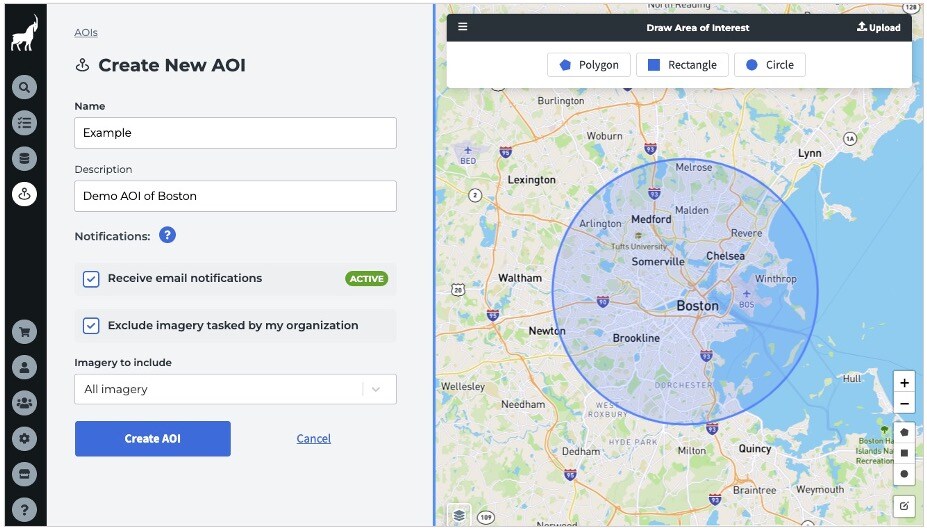
AOI List View
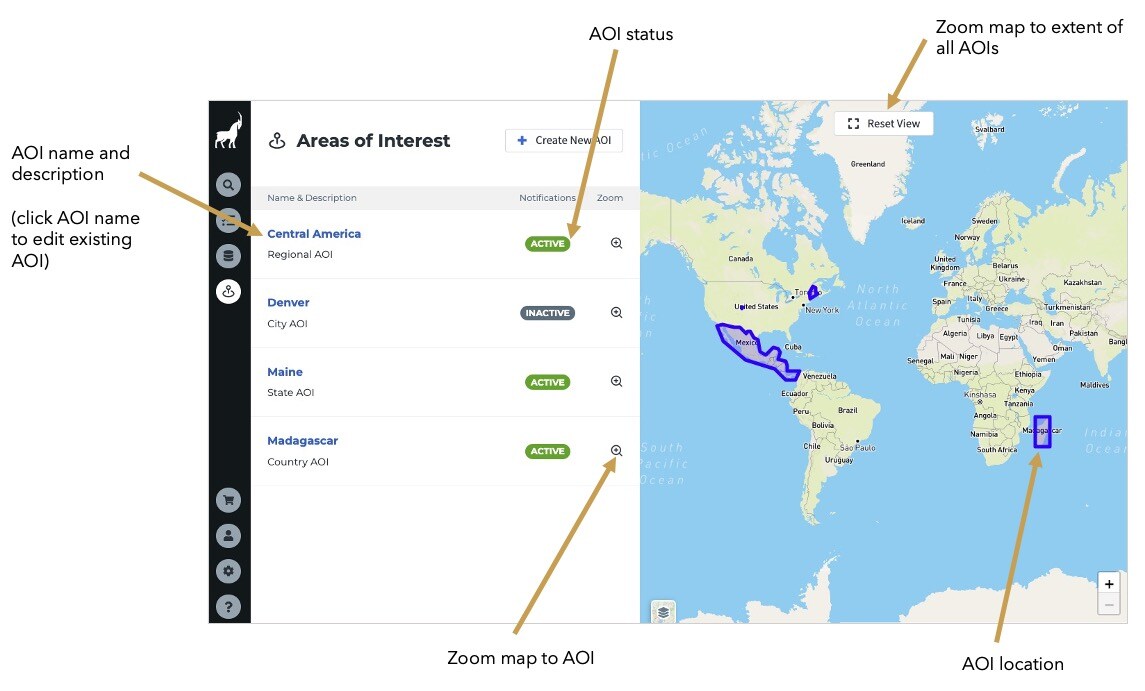
The AOI page lists all user defined AOI names and descriptions, AOI status, displays their location on the map and includes links to create a new AOI or edit an existing AOI. In addition, users can zoom the map directly to a specific AOI and reset the map to the full extent of all AOIs by clicking the Reset View button at the top of the map.
Edit AOI
An existing AOI can be edited by clicking on the AOI name in the AOI list and the Edit AOI page is displayed.
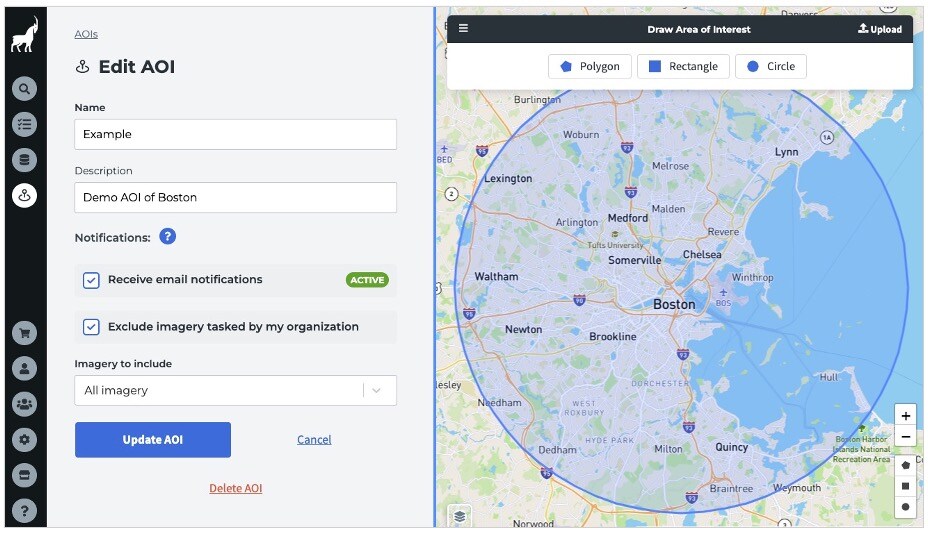
From the Edit AOI page, all AOI attributes can be modified. In addition, the AOI can be deleted by clicking the Delete AOI link at the bottom.
AOI Notification Email
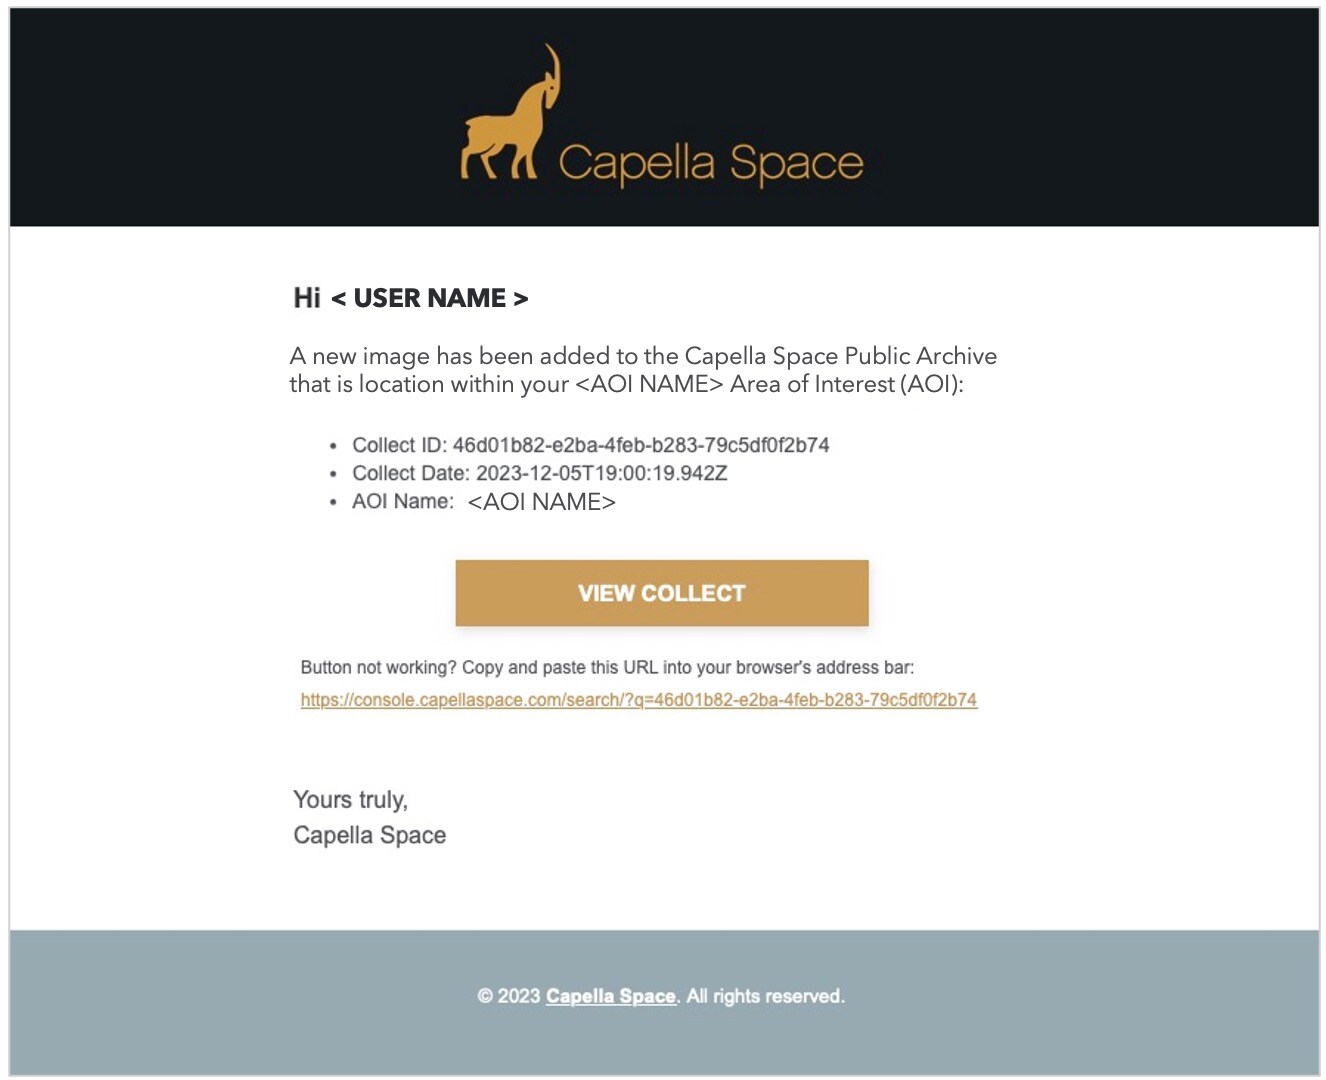
When a new image is published to the Capella Public Archive that intersects with an active AOI, the user receives an email like the following:
AOIs and the Public API
AOIs can also be created and managed in the Public API. For more information on AOI Public API endpoints, see the following API documentation.